No-Cheese Budget-Friendly Pizza on Stovetop
Think pizza, think cheese! But in the part of the world where I come from, think cheese, think expensive! That’s exactly why I came up with this No-cheese Budget-friendly Pizza on Stovetop — a delicious, no-oven recipe for those of us who still want to enjoy homemade pizza without the high cost of cheese.
Finding access to good cheese for most of us here often means spending money we’re not ready to budget for, especially in these hard economic times. And even beyond affordability, some people simply don’t eat cheese — I have a close relative who can’t stand it!
Thankfully, we’re learning new ways to make and enjoy pizza without needing cheese at all. In fact, I first learned this from a dear friend during a sleepover. She served us the most amazing pizza, and to my surprise, it had no cheese! From that day, I decided nothing would stop me from making pizza for my family — not the cost of cheese, nor the lack of an oven.
I’m glad that even without an oven, you can still make soft, flavorful pizza right on your gas stove. This recipe is not complicated, and I’ll walk you through how to bake it on top of your gas cooker using a pan or skillet.
I’m sharing this recipe with the hope that it will bless your hospitality journey as it’s blessed mine — giving you one more budget-friendly recipe to enjoy with your loved ones. I’ll be making two pizzas in 10–11 inch pans, but if you have smaller ones, simply reduce the ingredients accordingly.
No-cheese Budget-friendly Pizza on Stovetop
Equipment
- 2 heavy-bottomed pans 10 to 11 inches in diameter
- 1 Mixing Bowl
- 1 small sauce pan
- 1 Wooden Spoon
- 1 knife
- 1 grater
- 1 chopping board
- 1 Rolling Pin
Ingredients
For the Meat
- 1 kg minced meat
- 1 Medium size onion- sliced
- 3 cloves grated fresh garlic
- grated fresh ginger (same amount as the garlic)
- spices of choice (I used curry powder, beef masala, garam masala& cumin seed each ½ tsp, ¾ tsp paprika spice, & ½tsp black pepper)
- salt to taste (about ½ teaspoon)
- 3 to 4 tbsps cooking oil
For the Crust
- 3 cups all-purpose Flour
- 2 to 3 tbsps sugar
- 1 tsp yeast heaped
- 2 to 3 tbsps cooking oil
- 1 tsp salt
- warm water
For the Vegetables
- 2 medium size onions-sliced
- 3 medium size tomatoes-sliced
- 1 medium size courgette-sliced Optional
For the Base
- 2 tbsps tomato paste
Instructions
- Prepare the DoughStart by preparing the dough. In a large mixing bowl, combine the flour, sugar, and yeast. Stir well to mix them evenly.Next, add the salt and mix again to distribute it throughout the flour mixture.Make a well in the center, then pour in the cooking oil.Gradually add warm water, a little at a time, and knead until a soft but firm dough forms.Cover the bowl and place the dough in a warm spot — or out in the sun — to rise or proof until doubled in size.
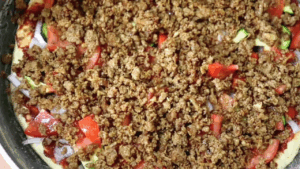
- Prepare the Meat ToppingNext, prepare the meat topping. In a suitable pan, heat the oil and fry the onions until soft and tender.Add the garlic and ginger, then cook for a few minutes until the mixture begins to turn lightly golden.Stir in the spices and a little salt to taste, mixing continuously to combine the flavors.Add the minced meat and cook while stirring frequently to break up any lumps, allowing it to brown evenly.Cover the pan and let the meat cook until all the water has evaporated and the mixture is nicely cooked through.Once done, set aside to cool slightly as you prepare the pizza base.
- Shape the Pizza BaseGrease and lightly dust the two pans, then set them aside.By now, the dough should have proofed well. Uncover it, punch it down gently, and knead for a few minutes to bring it back together.Divide the dough into two equal portions. Cover one piece with a clean kitchen towel to prevent it from drying out as you work on the other.On a floured surface, roll out the piece you’re working with into a circular shape that fits your pan. Carefully transfer the rolled-out dough into one of the prepared pans, making sure it fits in evenly along the bottom.Do the same with the second piece of dough and the other pan.
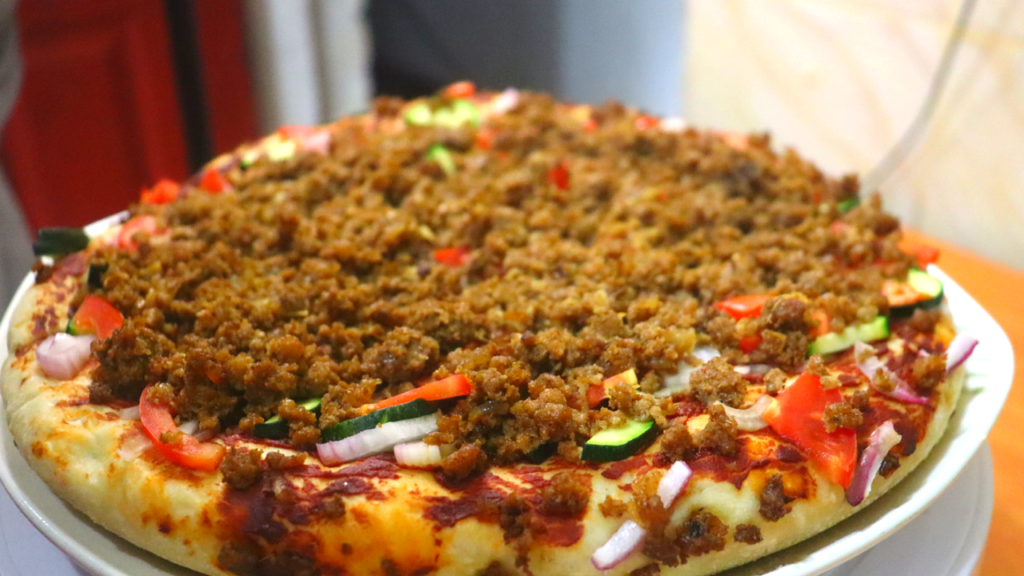
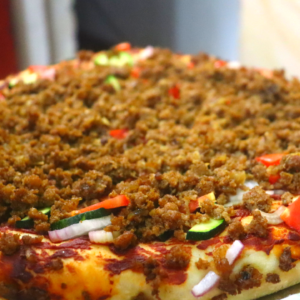
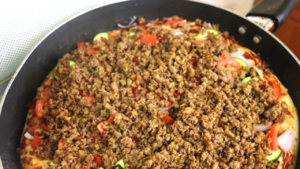
- Assemble the PizzaBegin assembling your pizza by spreading a tablespoon of tomato paste evenly over the surface of the prepared crust.Next, arrange half of the sliced onions evenly on top, followed by half of the courgettes (zucchini). Finish with half of the sliced tomatoes, layering them neatly over the vegetables.Sprinkle a little salt over the vegetables — about one-third of a teaspoon is usually enough.Evenly scatter half of the cooked minced meat over the vegetables. As you arrange your toppings, keep them about half an inch away from the edges of the crust. This prevents the ingredients from sticking to the sides of the pan as the pizza cooks.

- Begin Cooking on the StovetopPlace the pan onto your gas stove and let it heat on full flame for about 30 seconds to warm up the base.Next, reduce the flame — but not to the regular “low” setting, as that’s often still too hot and can burn your pizza before it’s cooked through. Instead, carefully adjust the knob as though you’re switching off the gas, stopping just before it turns off. This will give you a gentle, steady flame that allows the pizza to cook evenly without burning.It may take a little practice to find that perfect low flame, but keep adjusting until you get it right.
- Cook the PizzaCover the pan and allow the pizza to cook for 35 minutes to an hour. The exact time will depend on the size of your flame and the pan you’re using.Tip: I prefer using the wider burner plate on my gas stove for more even cooking. If you’re using a smaller plate, reduce the flame to the manufacturer’s lowest setting. Since the smaller plate produces less intense heat, the pizza won’t burn as easily. Keep checking occasionally though to ensure the pizza cooks evenly and thoroughly.
- Finish and ServeRepeat the same procedure to prepare and cook the second pizza.Once done, slice and enjoy! Tip for oven users: If you’re baking in the oven, you can make one large pizza using all the ingredients. Simply grease and dust your baking sheet (or line it with baking paper), then arrange the toppings exactly as described for the two smaller pizzas. Bake as usual, keeping an eye on it to ensure even cooking.Enhance your hospitality for the glory of God.

Video
Final Thuoghts
If you enjoyed this No-cheese Budget-friendly Pizza on Stovetop, you’ll love the step-by-step video on my YouTube channel, Recipes and Hospitality with Clara, where I share more easy, affordable, and oven-free recipes for everyday hospitality. Don’t forget to subscribe so you never miss a new recipe!
You can also join my Formations of a Noble Woman newsletter for faith-filled encouragement, homemaking inspiration, and practical recipes that make hospitality a joy. Let’s continue growing together in grace, creativity, and purpose — both in the kitchen and in our walk with God.
Recommended:
Kenyan No-meat Pilau Recipe| Best Pilau Recipe
Pilau Masala Spice Recipe Without a Grinder
Easiest 4-ingredient Mandazi on a Budget Recipe| Kenyan Mandazi
Cold Water Chapati Recipe| Kenyan Roti
Best Rabbit Meat Wet Fry Recipe
Easiest No-oven Granola Recipe
Basic No-oven Cake Recipe on Gas
Easy and delicious 😋😋
Thank you so much Beth! Yes it’s delicious.