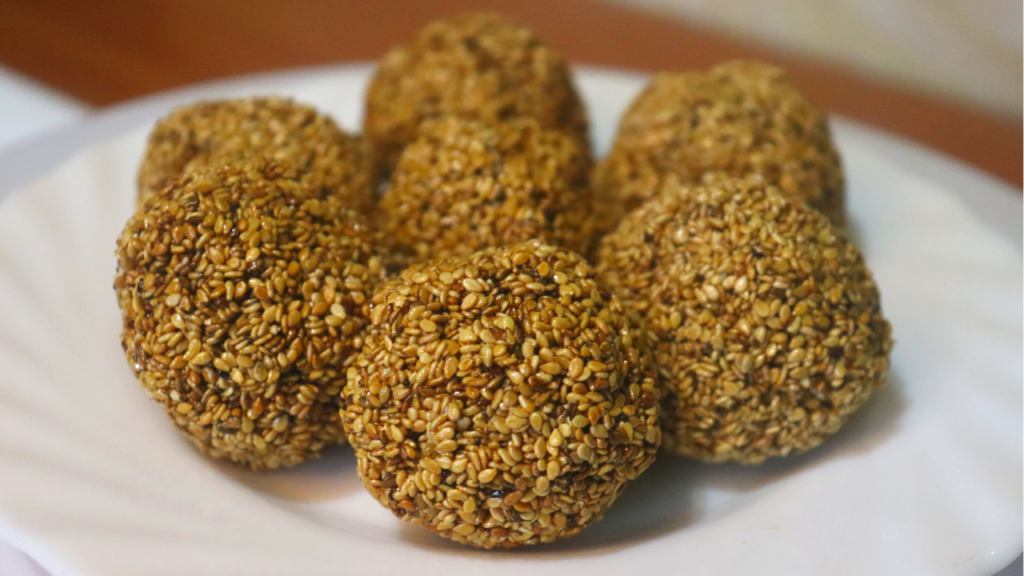
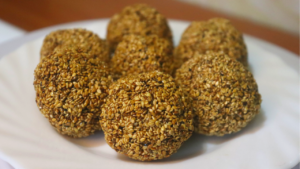
Here comes another creative way of making your sesame seeds! Turn them into simsim balls.
Simsim seeds, also called sesame seeds are tiny nutritious seeds.
Among other benefits, sesame seeds have certain kinds of vitamins and calcium, as well as being rich in antioxidants.
“Tsinuni” or Sesame seed Balls
I grew up consuming sesame seeds as a snack dubbed tsinuni.
I vaguely remember a lady who made these delicious simsim balls in the neighborhood where I grew up.
We loved buying and devouring them as children, begging our parents for the coins we would need to purchase this snack.
Traveling to our large town also meant having an opportunity to buy them along the way at a local market center where they would mostly be sold.
(Sesame seed balls or tsinuni are a favorite street food snack in the part of our country where I grew up.)
I often wondered how this delightful treat would be made. It looked like a very complicated process.
How would the sesame seeds stick together while having that firmness and texture that made them so uniquely tasty?
Learning to Make Simsim Balls
Several years later, my sister got to learn from a friend how to make simsim balls. She in turn taught me this invaluable skill.
Thankfully, acquiring the skill of making this sesame seed recipe is not hard or complicated at all as you will see when you try the recipe.
Once I learned how to make them, I began making simsim balls for my household.
I eventually did this to a level I felt quite confident to share the recipe of how you can make this sesame seed recipe at home.
Sharing the Simsim Balls Recipe
I first shared this process of how I make them over on our YouTube channel Recipes and Hospitality with Clara.
Because this recipe was well received when I posted it, I realized there is a growing number of people who are interested in learning to make simsim balls.
You can find the video linked at the end of the instructions to this recipe in case you’d like to watch the video tutorial of making these sesame seed balls.
A Healthy Snack
Because sesame seeds are also nutritious, simsim balls are a healthy snack. Both children and adults will enjoy this snack.
I also love them as a snack because they are so filling. It’s one of those snacks that you can rest easy after a child has eaten, knowing they won’t be hungry again so soon.
I trust you too will enjoy making your sesame seeds this way for your hospitality when you try this recipe.
Cleaning Sesame Seeds
Sesame seeds are very expensive when bought in the supermarket or store, at least where I hail from.
Buying them in a cereal/grains shop is the cheaper option. The only problem is they are usually quite dusty, coming with lots of debris, dirt, and stones.
What this means is that you will need to wash them before thinking of cooking them.
So how do I wash my sesame seeds once I get them from the market?
The Process of Cleaning Sesame Seeds
- Soak them in lots of water. Rub them with your hands for a few minutes. Usually, you’ll see the water becoming brown now that they are usually very dirty.
- Using a large sieve, sieve the water on the surface to get rid of the debris, mostly vegetable matter. Sometimes though, some seeds may also float to the surface. Redeeming these can be tricky as they are mixed with the debris but thankfully, most of the seeds have usually remained at a lower level.
- Add more water then transfer the sesame seeds to another suitable container with clean water to give them another wash using your hands. Transfer them carefully without disturbing the bottom of the container. This is because some dirt and stones will have settled at the bottom of the container. Once you’ve transferred the sesame seeds, get rid of the water together with the dirt and stones.
- In case your sesame seeds are dirty, they may need a third wash, rinse off the container and add clean water.
- Repeat the process of cleaning the sesame seeds in the second wash. Transfer to the container with clean water and repeat the process.
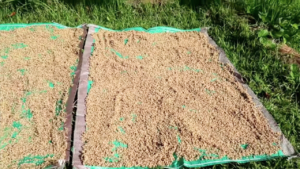
- Next, transfer them to a suitable clean container then take them out to the sun to dry. I usually spread them out flat on large sacks. I let them dry for up to three days until fully dry.

- I will then store them in an airtight container for future use.
For the recipe here, the sesame seeds are clean, dry, and ready to be cooked.
Let’s now get to the process of making our delicious simsim balls.
Simsim Balls Recipe| Sesame Seeds Snack Balls| Tsinuni
Equipment
- 1 wide pan
- 1 small saucepan
- 1 Wooden Spoon
- 2 tbsps
- 1 tsp
Ingredients
- 1&¼ cups sesame seeds
- ⅓ cup sugar
Instructions
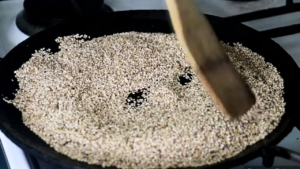
- Begin by preheating the pan on your stove for a few minutes until just hot enough; not too hot.Use one of the smaller burners on your stove. We need heat that's just hot enough not to burn our sesame as it cooks.Sesame seeds are really tiny as you know and they can easily burn if you use intense heat.
- Add the sesame seeds onto the pan.Stir them constantly the first 2 minutes with a wooden spoon.
- After the first 2 minutes, reduce the flame to the lowest option as your stove has been designed.Stir the sesame seeds frequently from now on for the next 10 to 12 minutes on that low flame. The reason one has to stir frequently is because sesame seeds are tiny. Some of the seeds can easily burn if left unturned for too long. You need to keep stirring to ensure even cooking.
- Once they are ready, switch off the flame and keep stiring them for another minute or two now that the pan is still hot then set aside.
- Add sugar into a suitable saucepan and place on a lighted stove stove. Once again, use one of the small burners on your stove.
- Cook the sugar, stirring whenever necessary until all of it is melted. Do not let it boil. Boiling results in simsim balls that have a slightly bitter taste.
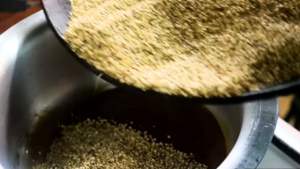
- Reduce the flame to the lowest, then add the sesame seeds to this melted sugar syrup and stir until the sesame seeds are well covered with and incorporated in the melted sugar
- Now reduce the flame to the lowest by turning the nob slowly as though you are switching off. The flame needs to be so low in order to help keep the sugar melted without burning.
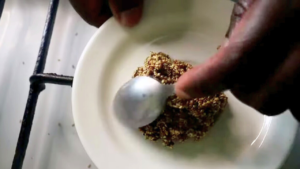
- Begin to form the balls by scooping a tablespoon of the mixture. Transfer it onto a suitable sideplate that can withstand the heat from the melted sugar.Shape it with a teaspoon into a ball as you give it a few seconds to cool slightly. Melted sugar is very hot. It can burn you as you work with the sesame seed mixture now that we will use our hands for the final shaping. You also wouldn't want the mixture to cool and harden before you shape it into simsim balls.
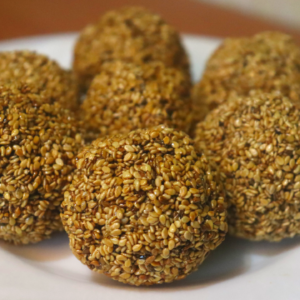
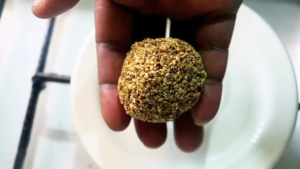
- Transfer the ball into your hands and shape it further, pressing it between your palms into a round shape to make it compact. Once it's compact, transfer onto a suitable platter or tray for the simsim balls to cool down further.As they cool, they'll harden to form the characteristic simsim balls.
- Repeat this same procedure with the remaining mixture until you have all your simsim balls ready. Remember to switch off the flame once you are done.
- Serve when they're warm or when they've completely cooled.Enhance your hospitality for the glory of God.
Video
Recommended:
No-oven Stovetop Gluten-free Gram Flour Cookies
No-oven Stovetop Danish Cookies
Easiest No-oven Granola Recipe
Basic No-oven Cake Recipe on Gas
Fermented Porridge Recipe the Natural Way
No Oven 2-ingredients Roasted Groundnuts Recipe
Easiest 4-ingredient Mandazi on a Budget Recipe| Kenyan Mandazi
Cold Water Chapati Recipe| Kenyan Roti
Best Rabbit Meat Wet Fry Recipe