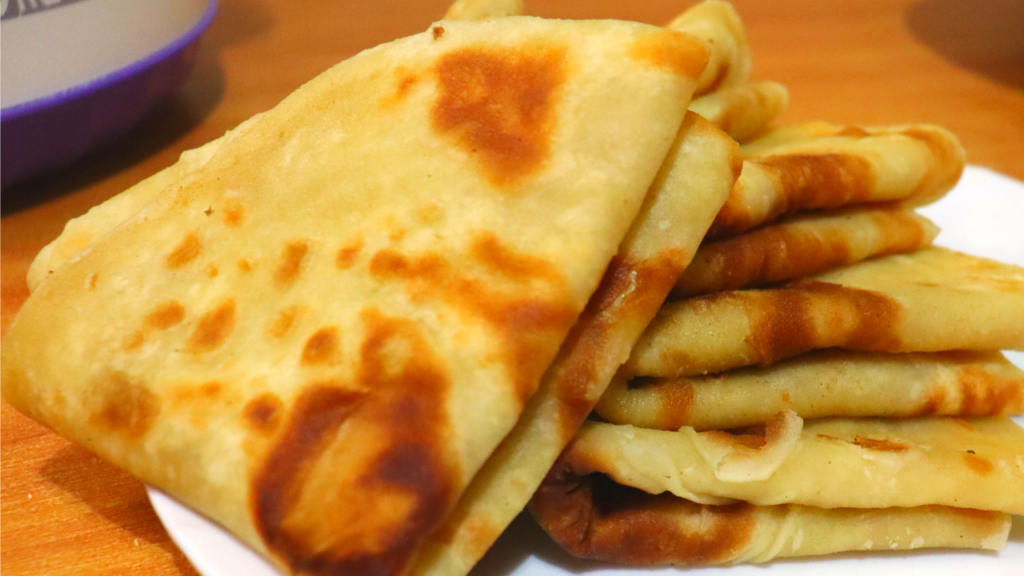
Chapatis are one of our country’s favorite meals.
Like pilau, you rarely miss it during celebrations and special occasions.
More often than not, it forms part of most weekly menus in many a home in Kenya.
For quite a while now, I’ve got positive and encouraging feedback from those who have eaten my chapatis.
I have had the opportunity to share my chapati recipes, both with hot water and cold water with countless people, both physically and online.
Most of those who got to try this recipe were simply amazed that it’s not complicated; ingredients are simple and readily available, you use less oil, the process is faster than several other chapati recipes, and that you can actually make soft delicious chapati with cold water.
When I realized that making delightfully tasty soft chapati is an art that anyone can learn, I decided to share my recipe here.
I trust you will enjoy your chapatis when you try this recipe.
One more thing: I like to take the opportunity to make more than one meal at a time when I cook. Making chapatis with 4 cups of water will give you 20 to 24 chapatis if you’re frying on an 11-inch pan, like me.
If you’re frying your chapati on a smaller pan, you will have even more chapatis.
Chapatis freeze very well. I will often make many so that I can freeze some for a future meal.
If you find over twenty chapatis just too many, work with half the recipe.
I have also learned to work with multiple pans, a skill that I learned over time. This reduces the time I make chapatis. Making lots of chapatis is therefore not “a whole afternoon event” for me.
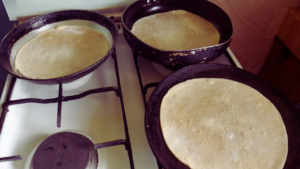
Making chapos while working with multiple pans can be a helpful skill to aim to learn, especially if you’re accustomed to making chapatis every week.
You can also engage another person to help you make chapatis when you use multiple pans. They can roll the pieces while you fry them, or viseversa. You can make a huge batch of chapatis this way in a very short time.
I trust you will enjoy this chapati recipe when you try it.
Enhance your hospitality for the glory of God.
Cold Water Chapatis| How to Make Chapati with Cold Water| Kenyan Roti
Equipment
- shallow-frying pan (I like to use multiple frying pans to hasten the process of frying)
- 1 Rolling Pin
- 1 suitable mixing bowl
- 1 turner (You can use a tablespoon in the absence of a turner)
- A rolling stool or board in the absence of a suitable rolling surface
Ingredients
- 4 cups cold water (Room temperature)
- 1 tsp salt (If you won’t add sugar, use a full tablespoon of salt)
- 3 tbsps sugar (Optional)
- All-purpose flour as needed to make a soft sticky dough (about 9 cups of flour that are heaped – could be slightly more or less)
- 2 tbsps cooking oil
- More cooking oil to fry
- *I find working with 3 cups wholewheat (atta) flour, then the rest all-purpose flour a ratio that works really well for my chapatis. Otherwise, feel free to work with all-purpose flour entirely. The chapatis will be really tasty too.
Instructions
- Step OneIn a suitable bowl, add the water and two tablespoons of cooking oil.Stir in the salt and water until dissolved. Because the water is cold, if the sugar and salt don’t all dissolve, it is well, just do your best to ensure most of it dissolves.
- Step TwoBegin by adding 5 cups of flour to the water mixture. Use your hand to combine the flour and water.Add in the rest of the flour, a cup at a time, mixing each time and ensuring the ingredients are evenly combined and you've formed a very soft dough.*I realized that different brands of flour will hydrate at differentt levels. The hydration will also depend on the humidity levels in your kitchen. You will hence need to add the flour a cup at a time until you get the desired texture, usually a very soft sticky dough.Having a very soft dough is one of the secrets to having soft chapatis. Don’t let your dough harden.Knead for a few minutes just to ensure the ingredients have blended evenly and the texture is also even throughout the dough.
- Step ThreeNext, cover the bowl with cling film or a clean kitchen towel to allow the dough to rest and relax. I will usually allow the dough to rest for 20 minutes. If you have more time on your hands, you can let the dough rest for an hour or more.After resting, you will notice the dough is quite soft and smooth when you uncover it. It’s also easier to handle.
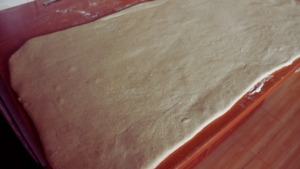
- Step FourTransfer the dough to a floured surface and knead for a few minutes. I like to knead mine for 3 to 5 minutes. Again, if you have time on your hands, knead your dough for about 10 minutes.Using your rolling pin, spread out the dough to form a large rectangular shape that’s approximately a centimeter in thickness.

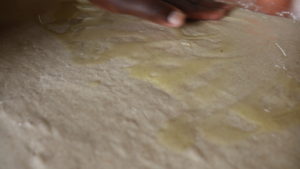
- Apply two tablespoons of cooking oil on the surface of the dough as shown.
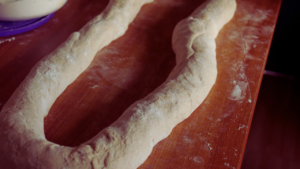
- Next, roll the dough into one long cylindrical rope-like shape, ensuring not to leave any loose air spaces as you do so. Seal the two ends so the oil doesn’t spill out as you fold.
- Once you’ve rolled the entire dough, seal off the edge by pinching it with your fingers to seal in the cooking oil as shown.
- We're sealing in the oil because that's what will eventually cause the chapatis to form layers.
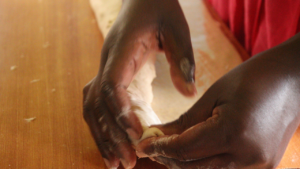
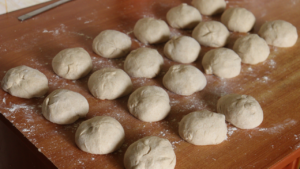
- Step FiveBecause we will do around twenty to twenty-four pieces, use a bread knife to mark the dough into 20 to 24 equal pieces. Please note that you’re not cutting the pieces, you’re simply marking to help you know where each piece should be cut at.My pan is eleven inches in diameter. In case yours is smaller, you might need to make more pieces to ensure the pieces are not too thick.Use the part of your hand that’s between the thumb and the index finger to cut the dough in the marked places by tightly squeezing until you cut it. I use this style to cut rather than a knife because it will make the sealing of the pieces so much easier.Once you cut a piece, seal it off with your fingers. Seal the main dough as well so the oil will not spill out as you cut the next piece. Keep doing this cutting and sealing until you have all the pieces ready and sealed on both ends.*Usually when you get used to making chapatis, you won't need to mark off the pieces, you will find you are able to cut the pieces to approximate size by eyeballing and cutting them. Arrange the pieces neatly on your surface and cover them with a clean kitchen towel. Allow them to rest for another fifteen minutes.
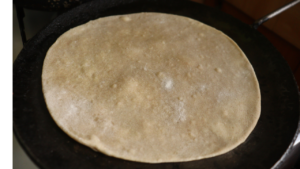
- Step SixPreheat the pan on the stove as you roll your first two pieces to give you a head start. You will be rolling them as you fry the chapati.Roll each piece into a circular shape that is about 10" in diameter if you are working with an 11" pan (in diameter) to ensure the chapati pieces won't be wider than the pan when you are frying them.Once your pan is hot, (not too hot though) ensure to regulate your fire to medium to low heat to allow your chapatis to fry without burning yet at the same time to fry fast enough so that they don’t stay too long on the pan. Another reason chapatis can harden is when they stay too long on the pan.*When you’re not sure how much fire to use, the smallest burner on my stove or gas cooker works well enough when on full flame. You could try it. Ensure to test yours first to ensure it doesn’t burn your chapati before it’s ready.Place the first piece on your pan. Allow it on the pan for about a minute. Once it begins to turn slightly dark, apply one tablespoon of cooking oil on the surface then turn it over.
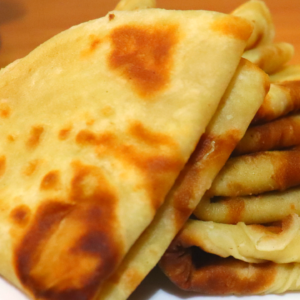
- Allow it to fry for 1 to 2 minutes or until it has formed patches with a nice golden color.Apply 1 tablespoon of cooking oil on the surface then turn the chapati over. Let it fry another 1 to 2 minutes or until it forms those patches of golden color like the previous side. Turn it over again, allowing it to fry another 30 seconds then transfer it to a suitable serving dish lined with paper towels to drain out any extra oil.
- Continue with this same process until all the chapatis are done.As you get accustomed to making chapati, you can use multiple pans to speed up the process of making chapatis, or work with another member of the household to help with either the frying or the rolling process.
- Once they are done, serve with a suitable stew and vegetables.You can also have it with your favorite beverage.Enhance your hospitality for the glory of God.


Video
Recommended:
Kenyan No-meat Pilau Recipe| Best Pilau Recipe
Pilau Masala Spice Recipe Without a Grinder
Easiest 4-ingredient Mandazi on a Budget Recipe| Kenyan Mandazi
Cold Water Chapati Recipe| Kenyan Roti
Best Rabbit Meat Wet Fry Recipe
No-cheese No-oven Budget-friendly Pizza Recipe on Gas Stove Top
Easiest No-oven Granola Recipe
Basic No-oven Cake Recipe on Gas