How to Make Cream Cheese
Have you ever been excited to try a recipe that calls for cream cheese, only to realize it’s either unavailable or way too expensive at the store? I’ve been there too. That’s exactly what led me on a journey to figure out how to make cream cheese at home—with simple ingredients, no special tools, and no mixer needed.
One day, I needed cream cheese for a dish I was testing, and when I saw the price at the store, I thought, There has to be a better way. That moment became the start of a rewarding kitchen experiment.
Through trial and error, I discovered that homemade cream cheese is not only affordable and easy to make, but it also tastes better than store-bought, in my view. The best part? You only need three basic ingredients: full cream milk, lemon juice, and a pinch of salt.
If you’ve ever wondered how to make cream cheese that’s creamy, spreadable, and nutritious—without a mixer or fancy equipment—this blog post is for you.
Whether you want to use it as a spread for bread or bagels, as a base for dips, or in your favorite baked recipes, this method gives you fresh, versatile cream cheese right from your kitchen.
In this step-by-step guide, I’ll show you how to make this easy recipe from scratch using raw or full cream milk, how to safely separate the curds from the whey, and how to whip it up into a smooth, spreadable delight—even if you don’t have a mixer.
You only need full cream milk, lemon juice and salt. These simple ingredients are all you need to get started with making cream cheese at home. The lemon juice curdles the milk to form cheese curds, while the salt enhances flavor and preserves it slightly.
So, grab a pot/ sufuria, a lemon, and some milk—and let me walk you through how to make cream cheese that’s budget-friendly, no-fuss, and absolutely delicious!
How to Make Cream Cheese at Home (No-Mixer Needed!)
Equipment
- 1 Saucepan or pot
- 1 Whisk or tablespoon
- 1 Fine sieve or cheesecloth
- 1 Small Mixing Bowl
- 1 Spoon or spatula
- 1 Glass storage container or bowl with lid
- Stove
Ingredients
- 1 litre full cream milk (raw milk works best, but store-bought full cream is fine)
- Juice from 1 medium juicy lemon
- ¼ tsp salt
Instructions
Boil the Milk
- Pour your 1 litre of full cream milk into a clean saucepan. Bring it to a full boil on high heat. Stir occasionally to prevent sticking. Once it starts boiling, reduce the heat slightly and let it simmer for 20–30 seconds. This ensures any potential pathogens are killed, especially if you’re using raw milk.
Add Lemon Juice
- Once the milk has simmered briefly, turn off the heat. Add the freshly squeezed lemon juice while stirring gently. You’ll notice the milk begins to curdle almost immediately—the curds (solid part) will separate from the whey (liquid).
Let It Sit
- Cover the pan and let the mixture rest for about 5 minutes. This allows the curds to form more fully and separate cleanly.
Strain the Curds
- Place a sieve or strainer over a clean bowl. Line it with a cheesecloth or use it as is if the holes are small enough. Carefully pour the curdled milk into the sieve to separate the curds from the whey. Allow the curds to drain for several minutes.

- Gently press down to remove excess liquid but don’t make it too dry—you want it moist enough to be smooth when whipped.Save the Whey!Don’t discard the whey. You can use it in smoothies, soups, or for baking. It’s rich in protein and nutrients and makes a great base for many recipes.
Mix Your Cream Cheese
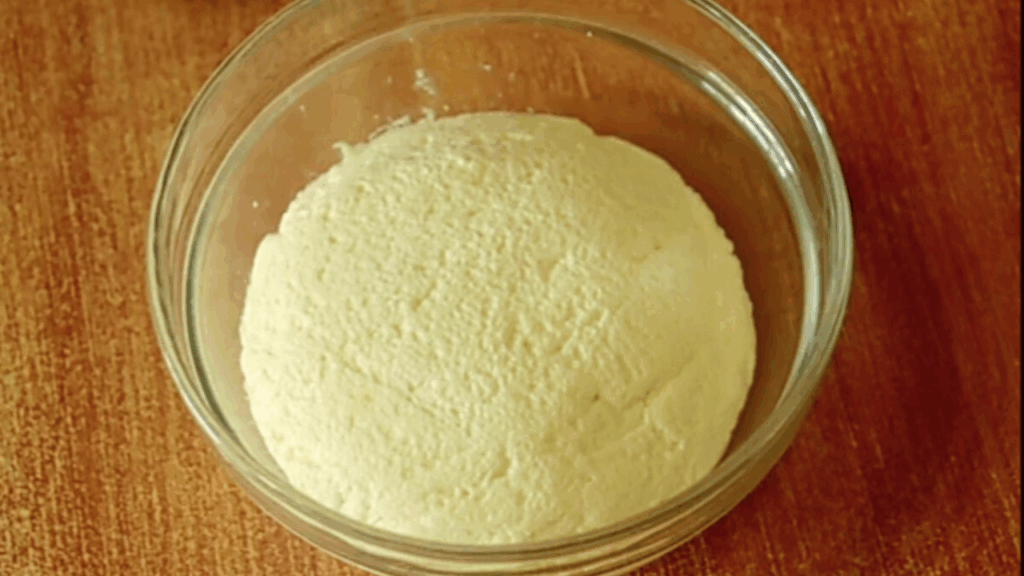
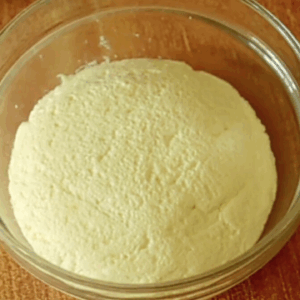
- Transfer the strained curds into a clean mixing bowl. Add your 1/4 teaspoon salt (adjust to taste). Now it’s time to whip your cheese. If you don’t have a mixer, use a sturdy whisk or even the back of a large spoon. Mash and whip the curds until smooth and creamy. This might take 2–3 minutes of mixing, but it works beautifully. If it feel too dry, feel free to add a drop or two of the whey.
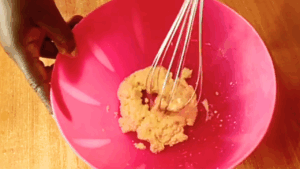
- If you’ve ever asked yourself how to make cream cheese without a mixer, this is the trick: consistent mashing and whisking by hand.
- The cream cheese is now ready!
Video
Notes
Storage Tips for Homemade Cream Cheese
Transfer your freshly whipped cream cheese into an airtight glass container or bowl. Cover with a lid or cling film and refrigerate. Use within 5–7 days for best flavor and freshness. Because this is a natural cheese without preservatives, it’s best enjoyed fresh.How to Use Your Homemade Cream Cheese
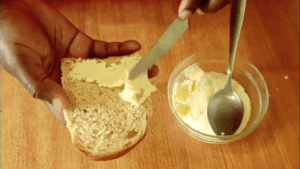
- Spread it on fresh bread or bagels
- Mix with herbs and garlic for a savory dip
- Use in cheesecakes or creamy sauces
- Stir into mashed potatoes for extra creaminess
Final Thoughts on Making Cream Cheese
Learning how to make cream cheese at home is a small but powerful way to save money, reduce store dependency, and add a touch of homemade charm to your kitchen routine. With just a few ingredients and a little time, you can create a creamy, nutritious spread that elevates everyday meals.
This recipe is especially helpful if you enjoy hosting guests or feeding a growing family on a budget. You can pair it with homemade bagels (check out my no-oven mini-bagels recipe on YouTube or add it to your breakfast rotation.
I hope you try this and see how easy and satisfying it is to master making this recipe in your own kitchen—no mixer needed!
If you loved this recipe, be sure to check out my Basic No-Mixer Cream Cheese Frosting Recipe, where I use homemade cream cheese. I’m sure you’ll enjoy it too! Plus, don’t miss more simple and delicious recipes below to bless your home and hospitality.
Want more delicious recipes, hospitality tips, budget-friendly living ideas, and biblical encouragement for your journey?
Sign up for our FREE weekly newsletter here and receive uplifting content straight to your inbox.
You’re also warmly invited to subscribe to our YouTube channels here and here for video versions of this content and more inspiration for your home and faith walk.
Happy baking and God bless!
Recommended:
No-mixer Coconut Cream Cheese Frosting
Basic No-oven Cake Recipe on Gas
Fermented Porridge Recipe the Natural Way
No Oven Pan-baked Danish Cookies
No Oven 2-ingredients Roasted Groundnuts Recipe
Easiest 4-ingredient Mandazi on a Budget Recipe| Kenyan Mandazi