No Oven Sourdough Cookies| Budget-friendly Cookie Recipe
Make these soft airy delicious budget-friendly no-oven cookies at home with all the benefits of using a sourdough starter in the recipe. You will enjoy these easy-to-make cookies. No mixer or blender needed!Find an easy-to-follow video tutorial at the end of this post of how I make these cookies without an oven on your gas stove or cooker.
Equipment
- 2 mixing bowls
- 1 Wooden Spoon
- 1 or 2 Frying pans (Preferrably 11" in diameter or more)
- 1 Measuring Cup
- 1 teaspoon
- 1 Tablespoon
- Baking Paper (Optional)
- 1 Rolling Pin
- 1 Cookie cutter (You can improvise with a clean cup, glass, or small spice-bottle lid that is suitable for cutting the cookie dough)
Ingredients
- ½ cup active sourdough starter
- 2 tbsps warm or lukewarm melted marge/ butter (I had heaped the tbsps with marge before melting)
- 1 egg
- 1 tsp vanilla flavoring
- 2 cups all-purpose flour
- ½ cup sugar (Or as preferred)
- 1 tsp bicarbonate of soda/ baking soda
- ⅓ tsp salt
- 1 tsp marge/ fat to grease pan and a little flour to dust it (Alternatively, you can use baking paper)
Instructions
- Begin by adding the flour, sugar, salt, and baking soda to a suitable mixing bowl.Evenly mix them with a wooden spoon then set aside.
- Add the sourdough starter, melted marge/ butter, egg, and vanilla to a separate mixing bowl.Mix with a wooden spoon until evenly mixed.
- Add the dry ingredients to this wet mixture. Begin mixing with the wooden spoon until the dough is too heavy to mix with the wooden spoon.
- Switch to using your hands and mix until you've formed a stiff dough. If it is too stiff though, feel free to add a few drops of milk or water, otherwise, the ingredients should be sufficient to form a stiff but fairly malleable piece of dough.
- Continue mixing the dough with your hand a few more minutes, making sure the ingredients are evenly mixed throughout the dough. Gather the dough into a nice even ball and place it in the bowl.
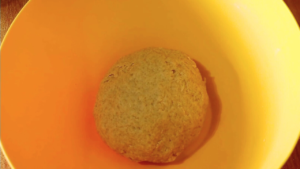
- Proceed to cover the dough with a clean kitchen towel.
- Allow it to bulk ferment for 8 to 12 hours.Don't expect it to rise or expand much. This is a rather heavy dough as you can already tell. But that isn't going to keep our sourdough starter from working in the dough.
- Better still, after the long ferment, I like to transfer my sourdough doughts to the fridge (not freezer) so the active sourdough starter can continue to break down the nutrients in the dough to make it easier for the body to digest. This will happen at a slower rate which is good.The dough should be okay in the fridge for at least 3 days. I personally dont like to keep it beyond 3 days.If you however don't have the luxury of more time, go straight to the next step of preparation and baking after the first bulk ferment of 8 to 12 hours.
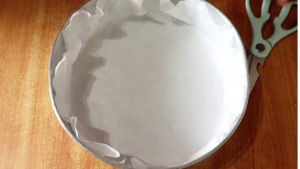
- Grease and dust a suitable pan. A wider pan is preferrable as it can bake more cookies. You won't have to bake the cookies many times.I also prefer to use two pans to hasten the process.
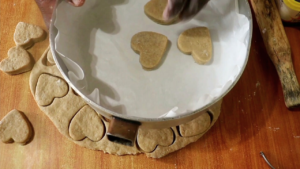
- If you'd rather use baking paper, simply line your pan with the baking paper. cutting and trimming with a scissor until the baking paper fits the pan as shown. I used both methods - greasing one pan and lining the other with baking paper to show you both methods work okay.(When baking the last batch of cookies which might fit into only one pan, use either of the pans without changing the baking paper for the one with baking paper, or greasing again the one you'd greased before. Both will work just as well for the second round.)
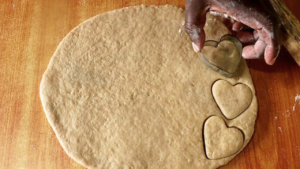
- Next, knead the cookie dough for a minute or so then lightly flour your surface and roll out the sourdough cookie dough to a thickness of about a centimeter or slightly less.
- Using your cookie cutter (or improvised cutter) cut into desired shapes.
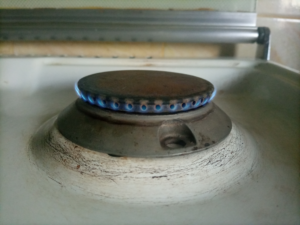
- Transfer to a lighted gas stovetop on full flame for 20 to 30 seconds just to heat up the pan.
- If it is the wide burner, don't reduce it as it's been designed to get to its lowest. That flame is still too high. It will burn your cookies before they are ready. Rather, reduce the flame as though you are switching it off and reduce to the lowest flame- the kind that if you blew hard on it, it would actually go off.
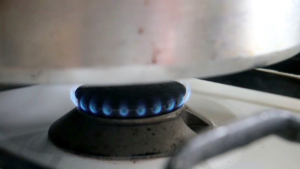
- If the burner is the smallest on your gas stove, reduce the flame the way it has been designed to get to its lowest by your stove manufacturer. Because the burner is tiny, this flame is usually too low to burn your cookies. It will bake them just fine on this tiny burner.I happen to have these two tiny burners on my stove. (One is slightly bigger than the other but still low.) I prefer baking with these because getting to that low flame is so much easier than when I'm working with the wider burners. The cookies will also tend to bake faster on these tiny burners without burning.
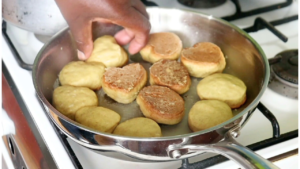
- Your cookies should bake for 15 to 20 minutes then they'll be ready.Usually, when baking on the gas stove, they'll not brown on the surface. Turn them over and bake another 10 minutes so they can brown on the opposite side.
- Your cookies are now ready. Transfer to a cooling rack or appropriate tray or platter to cool.
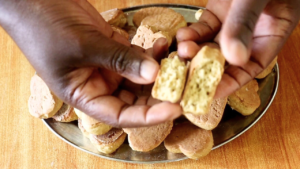
- Once cooled, enjoy with a suitable beverage. Enhance your hospitality for the glory of God.