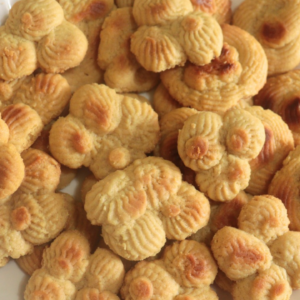
No-Oven Danish Cookies: A Simple Guide to Buttery Perfection
Craving Danish cookies but don’t have an oven? This easy, no-bake Danish cookie recipe delivers a buttery, crispy delight using simple tools and ingredients. Learn step-by-step how to make these classic cookies at home! You can also find an easy video tutorial linked at the end of this post.
Equipment
- 1 Mixing Bowl
- 1 wooden spoon or spatula
- A wide pan and lid (I like baking in multiple pans to speed up the process -up to 3 pans if possible)
- An assortment of measuring cups and spoons as needed
- 1 piping bag with preferred nozzle if using
- Baking paper if using
Ingredients
- 1 & ½ cups all-purpose flour
- ¼ tsp. salt
- ½ cup icing sugar
- 4 tbsps. heaped margarine or butter
- 1 egg
- 1 tsp. vanilla flavoring
- 1 tsp. margarine or fat (for greasing) and a little flour for dusting (Alternatively, you can use baking paper instead for lining the pans)
Instructions
- Cream the Butter and Sugar:In a mixing bowl, combine the margarine (or butter) and icing sugar. Use a wooden spoon or spatula to mix until the mixture becomes soft and creamy. This step is crucial for achieving the signature light and crumbly texture.
- Add Wet Ingredients:Once the butter and sugar are well combined, add the egg, vanilla, and salt. Mix thoroughly to create a smooth, even batter.
- Incorporate the Dry Ingredients:Gradually add the flour in three batches, stirring well after each addition. Mix until a soft dough forms. If the dough feels too sticky, refrigerate it for 15–20 minutes before proceeding to the next step.
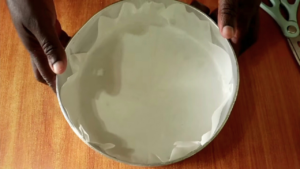
- Prepare Your Baking Surface: Grease a pan with margarine or fat, then lightly dust it with flour.Alternatively, you can line the pan (or sheet if baking in the oven) with baking paper. If you’re baking without an oven, I prefer to use a 2-3 inch high pan, which makes it easier to turn the cookies.If you want to complete the baking process faster, you can work with multiple pans - 2 to 3 pans to bake the cookies. In this case, grease and dust the 2 or 3 pans or line them with baking paper as I've done.
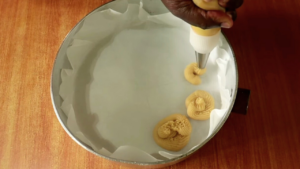
- Pipe the Cookies:Fit a piping bag with a star or round nozzle. Fill the bag with the dough and pipe out shapes onto the prepared pan. Popular shapes include rings, swirls, and simple round cookies. Leave space between cookies for expansion during baking.Piping Tip: If you don’t have a piping bag, you can use a zip lock bag with a corner cut off or shape the cookies by hand.
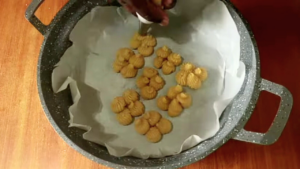
- This is the second pan. I used two wide pans so I was able to bake them all in one go at the same time using the two pans on two different burners.
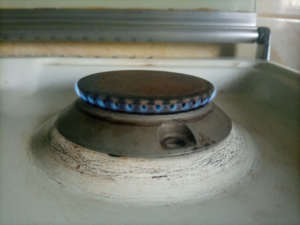
- Gas Cooker/ Stovetop BakingCover the pan with a fitting lid. Place the pan over a very low flame: Small burner: Heat on full flame for 30 seconds, then reduce to the lowest setting.Wider burner: Heat on full flame for 20 seconds, then reduce to a very, very low flame as shown below. I do this by reducing the flame as though I’m switching off and I get it to this very low flame.
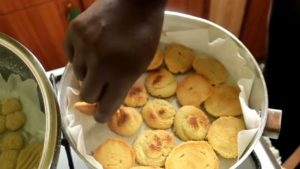
- Bake the cookies for 15-25 minutes, then turn the cookies over. Cover and continue baking for another 10 minutes until golden brown and crunchy.Transfer to a metal tray or cooling rack and allow to cool before serving.Repeat the process until all the cookies are done. You don't have to grease and dust the pan again.Pro Tip: If you want extra crispiness, let the cookies bake a few minutes longer, but watch closely to prevent burning.If baking in the Oven:Preheat your oven to 350°F (175°C). Bake until the cookies turn a light golden brown.
Video
Notes
How to Store Danish Cookies
- Keep in an airtight container at room temperature for 4 days. They could keep longer but they rarely get there in our household.
- For longer storage, freeze the dough before baking and thaw when needed.
- Avoid storing them in the fridge, as they may lose their crisp texture.
Serving Suggestions
Danish cookies are incredibly versatile and pair well with:- Tea or coffee: A classic pairing.
- Hot chocolate: The richness of the cookies complements the creamy drink.
- Milk: A nostalgic treat that kids love.
- Dessert platters: Serve with fruits, nuts, and chocolate for a gourmet touch.
Common Mistakes & Troubleshooting
-
Why Are My Cookies Spreading Too Much?
- The butter might be too soft. Try chilling the dough before baking.
- Overmixing can lead to spreading. Mix just until combined.
-
My Cookies Are Too Hard. What Went Wrong?
- Overbaking is the likely culprit. Check the cookies at the 15-minute mark.
- Using too much flour can also make them dry. Measure carefully.
-
How Do I Get the Perfect Shape?
- Use a piping bag for precision.
- If shaping by hand, roll dough into small balls and flatten slightly with a fork.