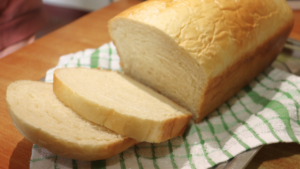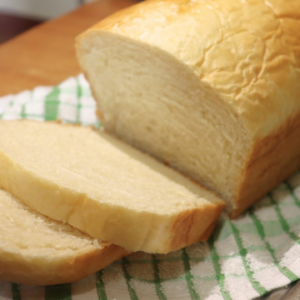
No Oven Bread on Stovetop| Make Bread Without an Oven
Make delicious bread without an oven on your stovetop or cooker with our easy budget-friendly straightforward favorite bread recipe. You will enjoy this one!
Equipment
- 2 mixing bowls
- 1 Wooden Spoon
- 1 Measuring Cup
- 2 tablespoons
- 1 teaspoon
- 1 Bread pan or tin (I'm using a 9" by 5" tin)
Ingredients
- 3 cups all-purpose flour
- 3 tbsps sugar
- 1 tsp instant yeast
- ½ tsp salt
- 4 tbsps cooking oil
- 1 cup warm milk
- ¼ cup warm water for proofing (You can use warm milk instead of water)
- A little cooking oil to grease bread tin (Or 1 tsp marge/ fat to grease the tin and a little flour to dust)
For the "Micro Oven"
- A large pan – wider in diameter than the bread tin you’re using
- 6 to 7 small stones – about ½ an inch to an inch in diameter
- 2 cups salt
Instructions
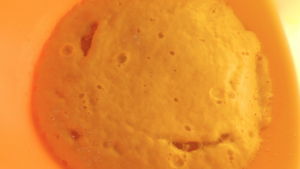
- Add the yeast, ½ teaspoon of the sugar, and ¼ cup warm water to a suitable bowl. Mix well with a spoon or wooden spoon.Cover with a clean kitchen towel and set aside for 10 minutes.
- Add the rest of the dry ingredients to another bowl. That is the flour, the rest of the sugar, and the salt. Give this a good mix with a wooden spoon. Set aside.
- After 10 minutes, check your yeast mixture. If it is foamy and bubbly, we will work with it. If it is not, then the yeast has probably expired. You may need to get fresh yeast for best results.
- Add cooking oil and half a cup of warm milk to the yeast mixture. Give these a good mix with a wooden spoon.
- We will add the dry ingredients to the wet in 3 batches. Add the first batch of the dry ingredients to the wet ingredients. Mix with your wooden spoon until just mixed into the wet ingredients. Add the next batch and mix the same way.Finally, add the final batch of dry ingredients to the wet ingredients. By now, the mixture will be too heavy to mix with your wooden spoon. Set the wooden spoon aside and begin to mix with your hands. Add the remaining liquid, a little at a time, until you have formed a soft sticky dough.Cover the dough with a clean kitchen towel. Let the dough rest for 10 minutes.
- After 10 minutes, transfer the dough to a floured clean surface and knead the dough for 10 minutes until soft and stretchy.

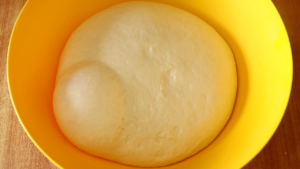
- Transfer the dough back to the bowl. Brush a little oil on the surface of the dough to keep it from drying out while proofing or rising.Transfer the dough to a warm part of your kitchen or out on a sunny day to proof for 45 minutes to one hour. It should double in size.*If the weather is cold and your kitchen is also cold, I usually create a warm microclimate by adding water to a small saucepan until quarterway in the saucepan. I will then heat the water and bring it to a boil. We will need the warmth from the water, not the heat. We don’t want the heat from the water to burn the yeast before it has a chance to help proof our bread. We will therefore cover the saucepan with a heavy kitchen towel that we’ve folded double. We will then place the bowl with the dough on the saucepan. The warmth through the towel should help provide a conducive environment for the bread to rise.
- Meanwhile, grease a suitable bread tin with some cooking oil. If you are greasing with marge or fat, grease then dust with a little flour.
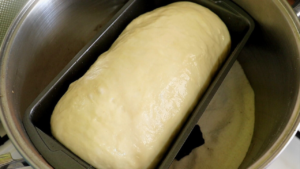
- Once the bread has sufficiently proofed and doubled in size,uncover it, beat it down then transfer it to a lightly floured surface. Knead it for a minute.Roll it out to a small rectangle that’s slightly shorter in length than your bread tin. Firmly fold it to form a rod-like shape that can easily fit into the bread tin.Transfer the dough to the bread tin. Cover with a clean kitchen towel and transfer to a warm place. Let it proof for 20 minutes.
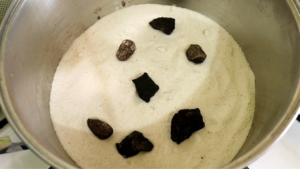
- Meanwhile, begin to create your micro-oven. Add salt to a large suitable saucepan that is wider in diameter than your bread tin.Add 2 full cups of salt to the pan. Flatten the salt out evenly in the pan.Arrange the little stones on the salt. These stones will help keep the bread tin above the salt and not in direct contact with the pan.
- Cover the pan.10 minutes before the bread dough finishes the proofing process, place the pan with the salt and stones on your stove or cooker on full flame for 5 minutes. After 5 minutes, reduce the flame to the lowest as designed by your manufacturer. Let it continue on this low flame for another 5 minutes. This is a total of 10 minutes.
- Uncover the bread and brush the surface of the bread with a little egg wash. Uncover the pan and carefully transfer the bread to the pan, ensuring the pan doesn’t burn you. It is hot.
- Cover the pan and bake for 45 minutes to an hour dependingon your flame. It should have baked through and with a golden tinge on the surface.Once ready, switch off the flame.
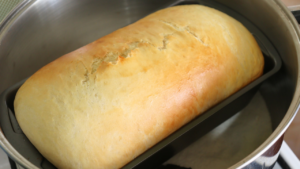
- Apply a little marge or butter on the surface so the bread will be soft and supple once it has cooled.
- Let it cool completely. Transfer from the tin to a suitable tray or platter. Your bread is ready for you to enjoy. Enhance your hospitality for the glory of God.