
Fermented Porridge Recipe from Scratch the Natural Way| No Citric Acid
Make your own fermented porridge at home from scratch the natural way using this easy-to-follow instructions below. You won't need to add citric acid. The unique taste of naturally fermented porridge is sufficient for your enjoyment when you get to sit down and to enjoy the fermented porridge once you've made it. Find an easy-to-follow video tutorial of this same recipe at the end of this post.
Equipment
- 1 Saucepan for cooking porridge
- 1 Wooden Spoon
- 1 Glass/ plastic jar or pitcher/ jug with a lid
- 1 Tbsp
Ingredients
- 10 tbsps uji/porridge flour – heaped. This is millet flour that you can also choose to evenly mix with other suitable flour ingredients as you buy. Ensure though that one of the ingredients is whole maize meal. If you are mixing the flours yourself, ensure that of the 10 tablespoons needed, one of them is whole maizemeal, about a tablespoon.
- 2 liters lukewarm or room temperature water (Plus a little more for the fermentation process. About 1 &½ cups of water.
- 8 to 10 tbsps sugar or as preferred
Instructions
- *Do not use store-bought sour porridge when making fermented porridge. Work with plain original whole meal flours when fermenting your porridge naturally.
- In a suitable glass or plastic jar, (or plastic jug/ pitcher as I’m doing) add 6 heaped tablespoons of flour. Add some water, about a cup, a little at a time, and stir the mixture until it is smooth.Cover the jar or pitcher loosely and place it in the pantry or area in your kitchen where it will not be disturbed.Allow it to rest for 24 hours.
- Uncover and stir the raw porridge mixture. Usually, it will show signs of fermentation already happening.

- Add the remaining 4 tablespoons of flour to the mixture. Stir while adding the remaining half cup of water. Mix until evenly incorporated.Now loosely cover the mixture and return it back to where it will be undisturbed for one and half days, that is, 36 hours.A fter a full 60 hours, (2 & ½ days) you will have your fermented porridge mixture ready.

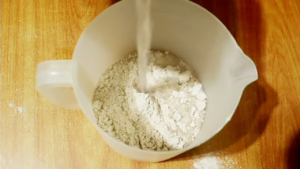
- To make the fermented porridge, add 2 liters of water to a suitable saucepan/sufuria. Place on your stove on full flame until it boils.
- Meanwhile, as you wait for the water to boil, give the fermented raw porridge mixture a stir with a wooden spoon until evenly mixed.Once the water starts boiling, pour in the porridge mixture, stirring continually as you do so. In case you need to rinse out the remaining porridge mixture to add to the pan, DO NOT use hot water. Use cold water. You do not want to kill the active bacteria in your jar or jug that will trigger the fermentation of the next batch of porridge.Continuously stir the porridge until you bring it to a boil. This continuous stirring ensures that no lumps form in the porridge.Stir in the sugar with a wooden spoon until dissolved. I like to add the sugar at this point so that it to cooks as well.

- Once the porridge is boiling vigorously, cover it, significantly lower the heat, and let it boil for 10 to 15 minutes then it will be ready.Because the porridge is fermented, you won't need to add lemon or citric acid. It has its own delightful taste from the fermentation.
- Ensure to cool it off a little until warm now that hot porridge is known to get hotter than your usual hot water.You can then serve.

- If you intend to keep making porridge, don’t wash your pitcher or jug. Simply mix in the next batch of porridge and let it ferment.This subsequent fermenting period will only take 24 hours.You’ll be able to have your porridge ready the next day for cooking.The bacteria in the pitcher will trigger the fermentation process in your porridge mixture each time, causing it to ferment for a shorter period of time.I will only wash my pitcher when I know I don’t need fermented porridge for a while. When I then need it, I will ferment it afresh using the procedure I’ve shared above.
- In case I’m not able to cook my fermented porridge, I’ll store my fermenting porridge mixture in the fridge so it doesn’t overferment or get spoilt. The cold environment in the fridge will slow down the fermentation process so it doesn’t spoil. I’ve kept it in the fridge for up to 5 days, not more than that. By then usually, I’m ready to cook the porridge.I have also kept my unwashed jug or pitcher as it is in the fridge when I'm not ready to ferment more porridge. I usually ensure to ferment porridge in it within the week just to be sure the bacteria is still active and can ferment my porridge. I trust you will enjoy the process and love your fermented porridge when you get to use the instructions above.Enhance your hospitality for the glory of God.