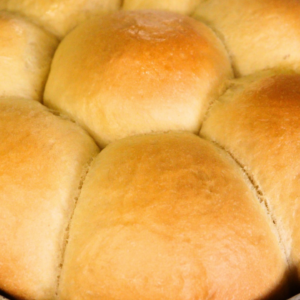
Easy No-Oven Sweet Rolls Recipe – Make Soft & Fluffy Bread on Your Stovetop
Love homemade bread but don’t have an oven? No problem! This no-oven sweet rolls recipe lets you bake soft, fluffy, and delicious rolls right on your stovetop. With simple ingredients and an easy stovetop baking method, you can enjoy bakery-quality bread without special equipment. Whether you're a beginner or an experienced baker, follow this step-by-step guide to create the perfect sweet rolls—no oven required! plus, don't miss the video tutorial at the end of this post for extra guidance.
Equipment
- 2 mixing bowls
- 1 Wooden Spoon
- 1 fairly Heavy pan (About 10 inches in diameter
- Measuring cups and spoons as needed
- 1 Clean Kitchen Towel
Ingredients
- 3 cups all-purpose flour
- 4 tbsps. sugar
- ½ tsp. salt
- 1 tsp. yeast (Active dry yeast or instant will do)
- ¼ cup warm milk (for proofing yeast)
- ½ cup additional warm milk
- 1 egg
- 2 tbsps. melted butter or margarine
Instructions
- Activate the YeastTo ensure your yeast is good, take1/4 cup of warm milk in a bowl. Add ½ teaspoon of sugar and 1 teaspoon of yeast. Stir the mixture and let it sit for 5-10 minutes. If the mixture becomes foamy and bubbly, your yeast is active and ready to use.
- Prepare the Dry IngredientsIn a separate large bowl, all-purpose flour, the sugar (minus the 1/2 teaspoon used earlier), and the salt. Give it a quick mix and set it aside.
- Combine Wet and Dry IngredientsOnce your yeast is proofed, add the rest of the warm milk, 1 egg, and the melted marge/ butter. (The melted marge/ butter should be warm or lukewarm, not hot) Stir well. Slowly incorporate the dry ingredients in batches, mixing continuously until a soft and slightly sticky dough forms. If needed, add a little extra warm milk to get the desired consistency as different flour brands might hydrate at different levels.
- Knead the DoughTransfer the dough to a floured surface and knead for 8-10 minutes until it becomes smooth and elastic. If you’re short on time, kneading for 5-8 minutes still works well.
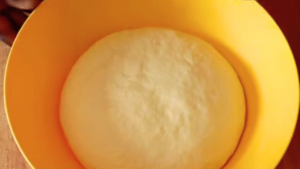
- Let the Dough RisePlace the dough in a greased bowl, cover it with a damp cloth, and let it rise for 45 minutes to an hour until it doubles in size. If it’s a cold day, you can create a warm environment by placing the dough near a warm spot in your kitchen or using a makeshift micro climate by placing the bowl over a warm (not boiling) pot of water.
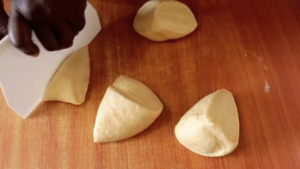
- Shape the RollsOnce the dough has risen, punch it down to release air bubbles.Transfer it to a floured surface, knead it for a minute, and divide it into 8 equal pieces. Shape each piece into a round ball and arrange them in a greased 10-11 inch heavy-bottom pan, leaving some space between them for proofing. Cover and let them rise for another 15-20 minutes.
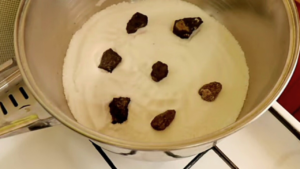
- Prepare Your Stovetop Baking SetupWhile the rolls are proofing, prepare your stovetop "oven." Take a larger pan that can fit your smaller baking pan inside. Pour 2 cups of salt into the bottom of the larger pan. Place a few smooth stones or a trivet over the salt to keep the smaller pan elevated. Cover and preheat this setup or micro oven on one of your wide burners for 10 minutes—5 minutes on high heat and another 5 minutes on low heat.
- Bake the RollsOnce preheated, carefully place the smaller pan containing the rolls inside the larger pan, ensuring it’s not in direct contact with the salt.
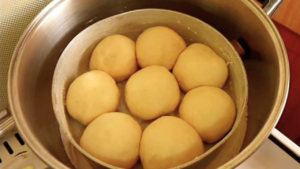
- Cover and bake on low heat for 50 minutes to 1 hour. Check occasionally to ensure they bake evenly.
- Add the Finishing TouchOnce baked, brush the warm rolls with butter or margarine for a soft and glossy finish. Let them cool for at least an hour before serving. The result? Soft, fluffy, and delicious sweet rolls without an oven!
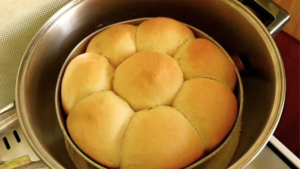
- Browning the topI realized that when I use some of the baking pans, the rolls will firm up on the surface, showing they are cooked but not browned on the surface.If this happens with your rolls, not to worry, simply flip them over onto a clean lid. Flip them again onto another clean lid to get the top side of the rolls back up.This is optional but you can brush the surface with egg wash for extra shine then gently slide the pan over the rolls to invert them back into the pan. Take the pan back in your micro oven for another 10 minutes to brown the top side.