Easy No-Oven Fruitcake with Jaggery: A Delicious & Affordable Recipe, No Mixer Needed
Indulge in this easy No-Oven Fruitcake recipe made with jaggery, offering a delicious and affordable treat. This no-bake recipe requires no oven or mixer, making it perfect for hot days. Discover the simple steps to create this healthy, flavorful, and budegt-friendly fruitcake that's sure to impress.
Equipment
- 2 mixing bowls
- 1 Wooden Spoon
- Measuring cups and spoons as needed
- 1kg-cake baking tin or fairly heavy sufuria/ pan (If using the second method of baking without an oven, you'll use the sufuria/ pan, about 8 inches in diameter- could be slightly wider if you want the cake to bake faster due to a wider surface area)
Ingredients
- 3 cups all-purpose flour
- 2 tsps baking powder
- 1 tsp bicarbonate of soda (Flattened)
- ⅓ tsp salt
- 1 tsp mixed spice
- 1 tsp cinnamon spice
- 1 cup finely grated jaggery
- 2 eggs
- 1 cup cooking oil
- 2 tsps vanilla flavoring
- 1 cup fresh juice (You can use fresh orange juicesqueezed at home or store-bought mixed berry juice)
- 1 cup 1 cup dried fruit (Cake mix or raisins)
For Greasing and Dusting
- 1 tsp marge/ fat to grease pan and a little flour to dust
Instructions
- Combine the flour, baking powder, baking soda, salt, and spices in a suitable mixing bowl. Mix until even.
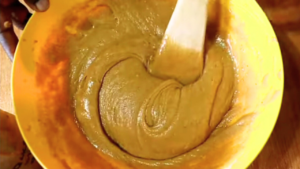
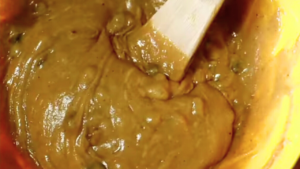
- Add the jaggery, egg, oil, juice, and vanilla to a separate mixing bowl. Mix with a wooden spoon until all the ingredients are well incorporated.
- Gradually add the dry ingredients to the wet ingredients and mix with a wooden spoon for a few minutes until just combined and smooth. Be careful not to overmix.
- Dust the dried fruit with some flour to keep the fruits from sinking at the bottom of the cake while the batter is baking.(Another alternative is to soak them in the juice the night before. Once they are big and puffy, they won’t need dusting.)
- Carefully fold the dried fruit into the cake batter until evenly distributed in the batter.
- Grease and dust the cake pan/ sufuria.
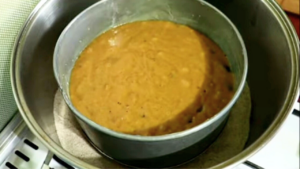
- Transfer the batter to the greased and dusted pan.
Method One of Baking Without an Oven
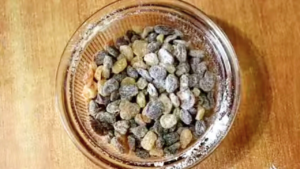
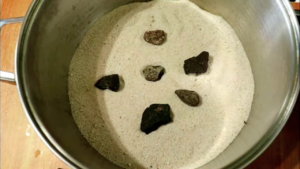
- Select a fairly heavy pan in which the cake/ bread tin you’ll use to bake will fit while leaving some space on the edges to place or lift the cake tin out of the pan.Add 2 cups of salt to the pan to protect it and help with even distribution of heat. Evenly spread the salt in the pan.Arrange 6 to 8 stones (about half an inch in diameter each) on the salt. These are the stones on which the cake will rest so it’s not in direct contact with the salt. This is going to be our micro-oven.I picked my stones from a construction site. Ensure you get heat-resistant stones that won't crumble when exposed to heat.
- Cover the pan, transfer to your stovetop, and allow it on the high heat setting for the first 5 minutes to heat the pan and salt.After 5 minutes, lower the heat to the lowest setting as designed by the stove manufacturer and allow 5 more minutes. This is a total of 10 minutes.Transfer the cake batter to the preheated pan with the salt and carefully place it on the stones.
- Cover and bake for 45 minutes or until a toothpick or taster inserted into the center comes out clean.
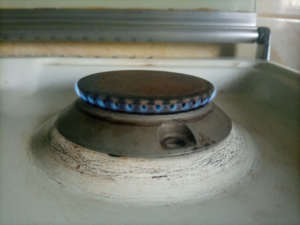
- If the cake bakes for longer than 40 minutes, reduce the flame further by taking it as though you are switching off and reducing it to a very low flame as shown below, the kind that if you blew hard on it, it would go off. This is so your cake won’t burn at the bottom as it bakes the last several minutes until it’s cooked through.
Method Two of Baking Without an Oven
- Remember to use a fairly heavy saucepan/ sufuria if using this method of no-oven baking. Grease and dust the pan. Pour the butter into the pan and cover.Transfer to your stovetop.If you are using the smallest burner on your stove, allow the cake on full flame for 30 seconds just to heat the pan. Now reduce the flame to the lowest setting and bake for 40 to 50 minutes until a toothpick or taster inserted into the center comes out clean.If you’re using one of the wider burners, allow it on full flame for 20 seconds to heat the pan.Reduce the flame to the lowest by turning it slowly in the direction you take the knob when switching off. Reduce it to the lowest flame as shown in the picture below.*Don’t reduce to the lowest as designed by your manufacturer for this wide burner. The lowest flame as designed for the gas stove is usually too high for your cake. It will burn before it’s ready.
- Let it bake for 45 minutes to an hour or until a toothpick or tester inserted into the center comes out clean.If you want the cake to brown on the surface, invert it back into the pan so the upper part of the cake is at the bottom of the pan. Let it bake for 10 minutes just to brown on the surface now that it is already cooked.
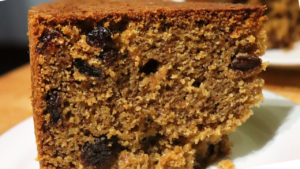
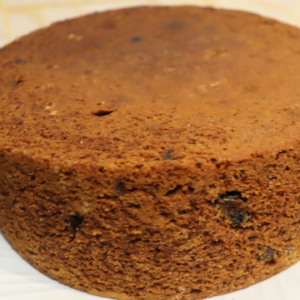
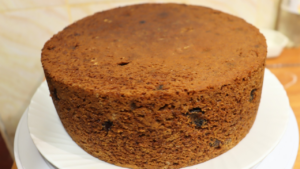
Once the Cake is Ready...
- Transfer the fruitcake to a suitable platter, plate, or cake board. Let the cake cool completely before serving.