Easy No-Oven Bread Recipe – Soft & Fluffy (Gas Stove Method!)
This easy no-oven bread recipe will show you how to make soft and fluffy bread on a gas stove using simple ingredients. Whether you're in a small kitchen, avoiding electricity use, or just curious about stovetop baking, this method guarantees bakery-quality bread with minimal effort. Perfect for beginners, this stovetop bread recipe delivers a golden, tender loaf without special equipment. Follow this step-by-step guide and enjoy warm, delicious homemade bread—no oven required! Plus, don't miss the video tutorial at the end of this post for extra guidance.
Equipment
- 2 mixing bowls
- 1 Wooden Spoon
- 1 fairly Heavy pan (About 7 inches in diameter)
- 1 Clean Kitchen Towel
- Measuring cups and spoons as needed
Ingredients
- 1 cup all-purpose flour
- 1 cup atta (whole wheat flour)
- 2 tbsps. sugar
- ¾ tsp. yeast (I like to use instant yeast but you can also use active dry yeast)
- ¼ tsp. salt
- 3 tbsps. cooking oil
- ¾ cup warm water (May vary)
- 1 tsp margarine or fat for greasing the pan (And a little flour for dusting)
Instructions
- Activate the YeastIn a large mixing bowl, begin by mixing the yeast with ½ teaspoon of the sugar and a portion of the warm water. Stir well and let it sit for 5-10 minutes. This allows the yeast to activate and ensures that it’s alive. If you see bubbles forming, your yeast is good to go!
- Mix the Dry IngredientsIn a separate bowl, combine the all-purpose flour, atta, sugar, and salt(Keep in mind that you can use all, all-purpose, or all, atta flour)
- Form the DoughOnce the yeast mixture has bubbled up, add 3 tablespoons of oil to it and mix with your wooden spoon. Add the dry ingredients to this mixture and mix with the wooden spoon as you gradually add the water.Switch to using your hands and mix until a soft dough forms.
- Knead the DoughTransfer the dough to a clean floured surface and continue kneading on a clean surface for 3 to 10 minutes to develop the gluten. This step is crucial for achieving soft and fluffy bread without an oven.(My kneading time varies depending on how much time I have as a busy homemaker. Whichever duration of time I have worked with, my bread has not disappointed! I must however add that the longer the kneading though, the better.)
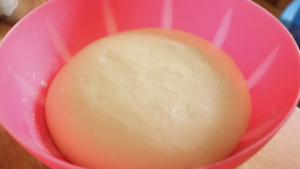
- Let the Dough RiseShape the dough into a ball and place it back in the bowl. Lightly brush the surface with oil to prevent drying. Cover the bowl with a clean kitchen towel or plastic wrap and set it in a warm place to proof for 45 minutes to 1 hour. The dough should double in size.If your kitchen is cold, create a warm environment by placing a bowl of warm water underneath the dough bowl.
- Prepare the PanWhile the dough is rising, grease a fairly heavy pan with margarine or fat and lightly dust it with flour. This prevents sticking and ensures even cooking.
- Shape and Second RiseOnce the dough has doubled in size, punch it down to release air bubbles. Knead it for a minute or two, then shape it to fit your greased pan. Cover again and let it rise for another 20 minutes.
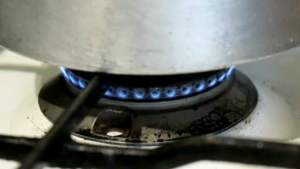
- Prepare and Heat the Pan on the Stove1. If you're using one of the tiny burners on your stove, place the pan on the burner and turn the heat to high for 30 seconds to preheat. Immediately reduce the flame to its lowest setting. 2. If you're using a wide burner on your stove, place the pan on the burner and turn the heat to high to preheat for 20 seconds. Don’t reduce to the lowest setting. The lowest setting for a wide burner is too high. It will burn the bread before it’s ready. Instead, reduce the flame as though you are switching off and reduce to a very, very low flame as shown below.
- Bake the BreadCover the pan with a lid and let the bread cook for 35 to 40 minutes. Start checking at the 35-minute mark—cooking times vary depending on stove types.
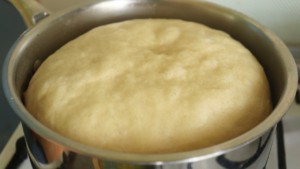
- Flip and Brown the Other SideOnce the bread is fully baked, you can flip it over onto a clean lid. Flip it again onto another clean lid to get the top side back up, then gently slide the pan over the bread to invert it back into the pan so the top part of the bread is at the bottom of the pan. Take it back on the low flame for another 10 minutes to brown that side too.
- Apply Margarine or Butter for a Soft CrustWhile the bread is still warm, rub a little margarine/ butter over the surface. This keeps the crust soft and enhances flavor.

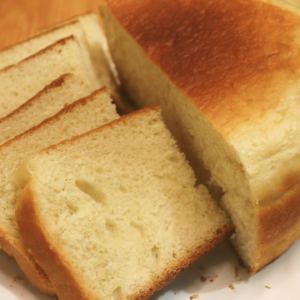
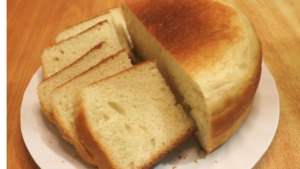
- Cool and ServeLet the bread cool before slicing. This allows the texture to settle, ensuring a perfect, fluffy loaf.Are you wondering how else to bake your bread on the stovetop, this time in a bread tin? In this post here, I show you how to bake no oven bread in a bread tin. You're welcome to check it out!
Video
Notes
Why You’ll Love This Recipe
- No Oven Needed – Perfect for those without access to an oven.
- Minimal Ingredients – Uses basic pantry staples.
- Soft and Fluffy – The perfect homemade bread texture.
- Customizable – You can add milk, eggs, or seeds for extra nutrition.
- Quick and Easy Stovetop Bread – A great alternative to traditional baking.