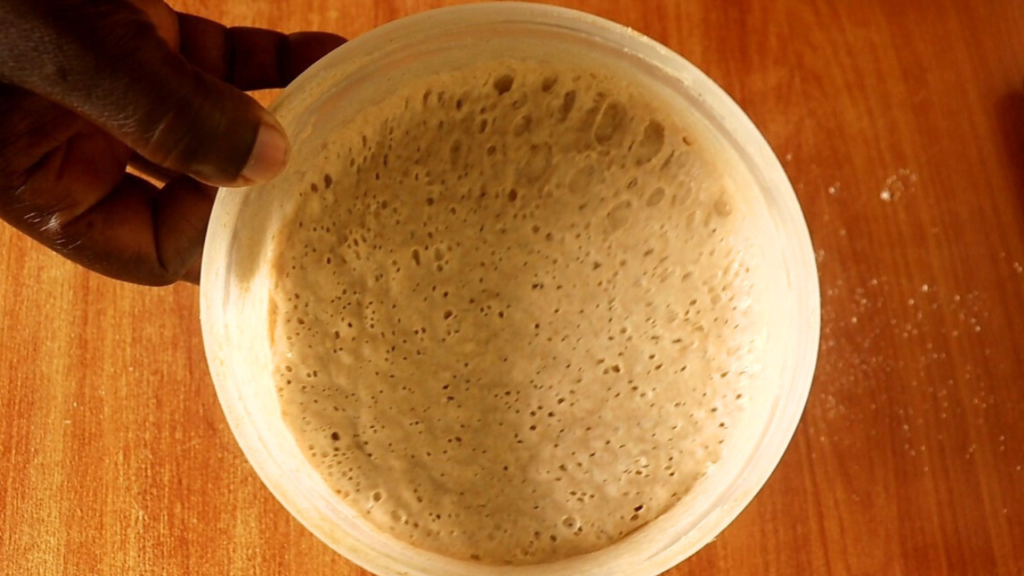
A Sourdough Starter
A Sourdough Starter is a leaven, or raising agent, made from fermenting flour and water over a period of time.
It makes use of naturally occurring wild yeast in your environment to facilitate the fermentation and production of a living working bubbly Sourdough Starter.
Sourdough Recipes
Discovering sourdough recipes is perhaps one of the most significant discoveries I have ever made.
Not only have I been enjoying working with sourdough, but I also find sourdough recipes healthier than their counterpart recipes with store-bought yeast or that take a shorter fermentation period.
Sourdough recipes are easier to digest also because the long fermentation process works on the nutrients in the recipe, breaking them down further in a way that your body can digest them more easily.
I also find them tastier with a rich sour flavor that complements most of the accompaniments that go with the recipes.
For instance, adding a layer of avocado on sourdough sandwich bread just takes it to a whole new level when it comes to taste.
A vegetable sandwich with sourdough bread is my preferred breakfast.
Other delights such as doughnuts and mahamri have won first place in my household compared to those I’ve made with storebought yeast.
Why Learn to Make a Sourdough Starter?
All this to say that this is why you need to arm yourself with a recipe for making a bubbly sourdough starter with ingredients that are available where you are.
Your sourdough starter, (and for other recipes, the discards coming from the sourdough starter) is the basic ingredients to the sourdough recipes you will make.
If for some reason your sourdough starter gets ruined, you will not struggle to make a new one when you arm yourself with knowledge and a recipe for making a fresh new sourdough starter.
My Experimentation Journey
I have been experimenting with several recipes using my sourdough starter and the discards.
I am loving the result with most of the recipes. I hope to share these recipes as soon as I’m certain each recipe has been well-tested and is hence shareable.
Having to make a sourdough starter over and over again and sustaining it for a number of days gave me the freedom and opportunity to experiment with several recipes.
The blessing of experimenting came with an interesting turn of events where I have been without a working fridge for months now.
This means I have had to make a fresh sourdough starter several times.
I have gained invaluable experience in making a sourdough starter to the extent I feel ready to share my journey of making a Sourdough Starter.
When God does enable me to acquire a fridge so as to keep my sourdough for a long time, I’m grateful for the experience this season has afforded me to perfect my sourdough starter-making journey as well as being able to document the process.
In the Absence of a Fridge…
I am even experimenting with preserving my sourdough starter without a fridge. If that works, I’ll share that here.
No Oven Sourdough Recipes
As you might know, I love to make recipes without an oven.
I’d love to see more and more households getting to make healthy sourdough recipes even when they do not yet have an oven.
As you would therefore imagine, the recipes I’m working with are hence majorly no-oven recipes or those that don’t need an oven to make.
I’m certain that you will enjoy the process as you get into the sourdough-making journey.
Measurements and the Atmosphere
Except for my measuring cups, I have not been one to work with a measuring scale.
The process of making a sourdough starter can be very rewarding as well as forgiving.
If your flour and water are good and fresh, the likelihood of your sourdough starter-making process failing is very low.
You will only need to arm yourself with lots of patience until your sourdough starter finally forms.
Keep in mind too that if the environment in your kitchen is cold, the starter may take longer to ferment to form a working sourdough starter.
The normal room temperature on warmer sunny days of the year also means a faster process in the formation of your sourdough starter.
For instance, the sourdough Starter I’m sharing took a day longer than it usually does to get to a bubbly starter.
We were just getting into the colder months in the part of the world I hail from. The cold environment slowed it down.
You will notice too if you watch the video that I decided to feed it two more days just to have an even bubblier sourdough starter even though I knew it would still work after the first 7 days I’d given it.
Older Maturing Sourdough Starter
Keep in mind also that as your sourdough starter ages, the better it becomes.
This is why a fridge is a wonderful investment in helping you extend the life of your starter by refrigerating it and feeding it at least once a week.
This is also why I am presently experimenting with how to keep my sourdough longer without a fridge.
I sure hope you will enjoy the process as I show you how to make your own sourdough starter.
Let’s now get into the process.
Easy Sourdough Starter Recipe With Wholewheat Flour for a Beginner
Equipment
- 1 Glass or Plastic Bowl or Jar With a Lid (This should be able to hold your starter sufficiently as it expands so as not to flow over the jar or bowl if possible)
- 1 Small Whisk or Wooden Spoon (A normal spoon will still do in the absence of a wooden spoon)
- 1 Clean Kitchen Towel
Ingredients
- Clean Room-temperature (or lukewarm) Water
- Wholewheat (Atta) Flour
Instructions
- In a suitable glass jar or plastic bowl that has a lid, add equal proportions of flour and water, that is half a cup of water and half a cup of flour. We’re looking for 100% hydration.*I use clean unchlorinated rainwater. In case yours is chlorinated, ensure to boil it, cool it then use it for your sourdough starter recipe. Boil plenty of it and cool it so you’ll have enough water for the multiple times you’ll need to feed your starter.
- Mix the flour and water with your wooden spoon or whisk until well-mixed.
- Cover loosely with the lid and transfer the bowl or jar to a place in your kitchen or pantry where the mixture will not be disturbed.The reason we’re covering it loosely is to allow for the oxygen needed by the fermentation process to be accessible to the mixture as well as allow space for any gases emitted to escape.
- Let the mixture remain undisturbed for 48 hours, that is 2days.
- After 2 days, uncover the mixture, and evenly stir it.Add half a cup of flour and half a cup of water. Evenly stir the mixture with your wooden spoon or whisk.
- Cover loosely with the lid. From this point onward, I like to loosely cover the entire bowl, lid and all, with a clean kitchen towel.Fruit flies are unwelcome guests that love sourdough starters.You’ll see them begin to hang around your starter.The longer it ferments, the more they’ll want to get into your starter. I have found that covering your fermenting mixture of flour and water with a clean kitchen towel an effective way of keeping fruitflies at bay.
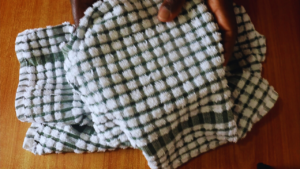
- Place it again in your usual spot. We will allow it to ferment for 12 hours.
- After 12 hours, evenly stir the fermenting mixture, discard half of the sourdough starter.*By discarding, I don’t mean throwing the discarded Sourdough Starter away. I like to collect my Sourdough Starter discards in a separate jar or appropriate container. (up to 3 to 4 discards) I will then use the discard in a recipe such as pancake, pizza crust, etc.
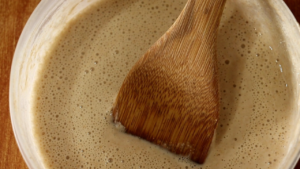
- From now on, you will follow this pattern with your developing Sourdough Starter. Every 12 hours, evenly stir the mixture, discard half of it, then feed the remaining one with half a cup of flour and half a cup of water, stirring it evenly, covering it loosely with a lid, then a clean kitchen towel.
- Keep to this procedure until you begin to see it turn into a bubbly Sourdough Starter.
- Usually, my fermenting mixture begins to form little bubbles on the 5th day.If it’s not very cold in my kitchen, it becomes bubbly on the 6th day. This means it now has the leavening agent or wild yeast needed to leaven my recipes.Sometimes also, when I use a different type of flour, it could go up to the 7th day.When the kitchen is generally cold, my Sourdough Starter will usually form a day later than usual.This particular one I’m demonstrating with went up to the 7thday. I could tell it was because my kitchen was getting colder than normal even with my preferred wholewheat flour. I use Butterfly's Stone Ground Atta in Kenya)

- The longer you feed your new Sourdough Starter, the bubblier it gets.I continued feeding my Sourdough Starter on days 8 and 9, every 12 hours too. It got thicker and more bubbly than ever.
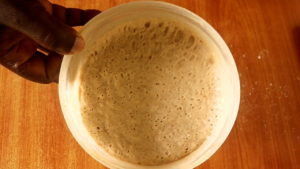
- In case your fermenting flour and water mixture hasnt formed a Sourdough Starter by day 10, (evidence being formation of some bubbles in the mixture) try and change the flour and start all over again.Formation of a Sourdough Starter shouldn’t be a complicated process. It may take much longer for instance if you are using all-purpose flour. From my experience though, especailly with wholewheat flour, it should have formed a Sourdough starter any time from Day 6 to Day 9.
- Once your Sourdough Starter has formed, keep feeding it every 12 hours then work with it in your recipes. If not, keep it in the refrigerator and feed it weekly.Keep in mind also that when you need to use your refrigerated Sourdough Starter, ensure to get it out of the fridge and to feed it at least 8 to 12 hours before using it.
- A sourdough starter that is well taken care of will keep going for years.I trust you will enjoy your sourdough starter journey, as you enhance your hospitality for the glory of God.
Video
Recommended:
Sourdough Mahamri Recipe| Swahili Donuts
Sourdough Cookie Recipe| Budget-friendly
Fastest Way to Ferment Porridge With a Sourdough Starter| Porridge Recipe
Sourdough Drop Scones With Discard| Breakfast Recipe

