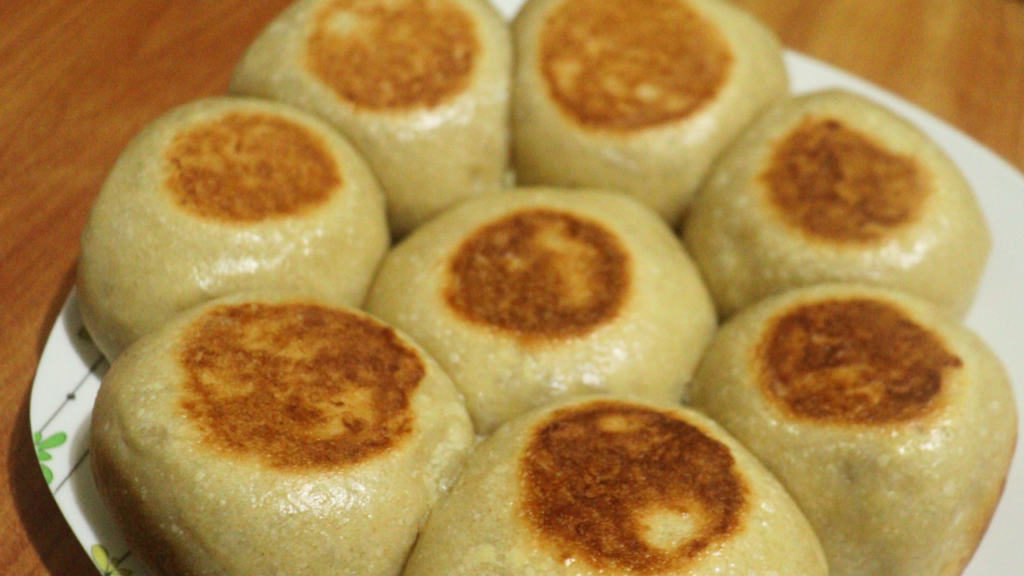
Forget the oven, right? These no-oven stovetop sourdough rolls are a delicious and easy way to enjoy fresh, homemade bread without needing a conventional oven.
I live in a part of the world where an oven is often out of reach for several folk.
That was my situation for a few years. I’m grateful for this experience because it made me get creative and learn how to bake without an oven.
This priceless skill came in handy recently when my oven “decided” to break down. Despite the disappointment, I’m glad I’ve still been able to bake my favorite recipes without an oven, including these healthy sourdough rolls.
The sourdough bread recipe I’m sharing is also perfect for those who live in hot climates, have a small kitchen, or want to try something new.
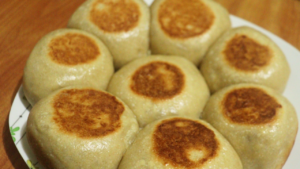
The sourdough rolls are crispy on the outside and soft on the inside, with a delightful tangy flavor characteristic of sourdough bread recipes.
Why Sourdough Rolls or Bread?
Because I have been on the Sourdough journey for quite a while now, I developed this bread rolls recipe, making use of my active homemade Sourdough Starter.
As you might know, leavening bread dough with a sourdough starter is the healthier way to leaven your dough.
A Sourdough Starter is a leavening agent, formed naturally and containing wild yeasts and other useful probiotics.
During the bulk ferment, these microorganisms work on your dough to break down the nutrients further, making it easier for your body to digest them.
Sourdough rolls are healthier than the usual rolls made without a sourdough starter. This is why I use my sourdough starter to leaven many of my recipes.
Can You Store Your Sourdough Rolls for Future Use?
Sourdough bread freezes well. This goes for the rolls too.
I almost always meal prep my bread and rolls. Once they are baked, I let them cool completely.
I can then store them in the freezer. I like to store them for up to a month. I rarely get there though. Bread is such a versatile dish, coming in handy when you need it for breakfast, lunch, or dinner.
The best is to get it out of the freezer the night before. By morning, it usually has defrosted sufficiently. You can defrost quickly with a microwave using the quick defrost function. I however prefer the slower overnight or several-hours defrost method.
What ingredients will you need for this easy sourdough rolls recipe ?
Here are the ingredients you need to make these delicious sourdough rolls at home:
All-purpose flour (or whole-wheat/ atta if you’d prefer)
I work with any quality all-purpose flour to make this bread recipe. Use your favorite all-purpose flour brand to make the rolls.
Active Bubbly Sourdough Starter
I like to use an active bubbly sourdough starter for this recipe.
For this, I’ll feed the starter 4 to 6 hours before then use it when it is active and bubbly.
I have also used sourdough starter that I fed the previous day and stored in the fridge then used the next day. If the starter has been around several months (Or older than this) and is not freshly made, it should still work alright because it is mature.
Sugar
Sugar enhances the taste of the sourdough rolls. The amount of sugar for this recipe doesn’t make them overly sweet. If you want to reduce the sugar further, feel free to do so. You can also substitute it with honey.
Salt
The salt enhances the taste of your rolls even more. Salt gives the sourdough rolls a delicious balanced taste that you will enjoy.
Cooking oil
Any good quality healthy cooking oil will do.
Milk
Milk will make your rolls healthier, softer, and more nutritious. You can also use milk and water in equal proportions if you don’t have lots of milk.
Water will still work though if you have no milk.
Baking soda (Optional)
Also called bicarbonate of soda, works best for those who appreciate sourdough recipes but are a bit uncomfortable with the sour tangy flavor. They’d like the sourness slightly tempered.
This especially the case if you are new to the sourdough journey or you have little ones who are still getting used to the sourdough taste.
Baking soda significantly tempers the sourness. Thankfully, the sourdough taste is still there and you can still enjoy your healthy sourdough bread.
Egg Wash
Because of the way we are baking these rolls without an oven, you may not need egg wash. If you would however like them to have some shine, you can use egg wash at the point I’ll tell you to use in the instructions.
I don’t crack my head trying to figure out the very right measurements of my egg wash. I simply beat an egg into a little bowl, add a little milk and mix. There, my egg wash is ready.
Are you ready to embark on this exciting journey of baking your sourdough rolls without an oven the easiest way? Let’s get into our easy step-by-step guide below.
No-Oven Stovetop Sourdough Rolls: A Flavorful, Easy Bake
Equipment
- 2 mixing bowls
- Wooden Spoon
- Fairly heavy pan and its lid (Preferably 10 to 11-inch-in-diameter pan)
- Measuring cups and spoons as needed (If you don’t have them, improvise with cups and spoons close in measurement in the kitchen)
- 2 lids
- Suitable plate/ platter
Ingredients
- ½ cup sourdough starter (active and bubbly)
- 2 cups all-purpose flour
- ½ tsp salt
- 2 tablespoons sugar
- 2 tbsps cooking oil
- ¾ cup room temperature milk
- ½ tsp Optional: baking soda if you’d like to slightly temper the sour taste characteristic with sourdough bread/ rolls
- Optional: Egg wash
- 1 tsp marge/ fat to grease pan and a little flour to dust the pan
Instructions
- Mix the flour, sugar, and salt evenly in a suitable mixing bowl. Briefly set aside. Add the sourdough starter, cooking oil, and half of the milk to the second mixing bowl. Evenly combine using a wooden spoon. Add the dry ingredients to these wet ingredients in two batches. Mix with your wooden spoon each time while adding the remaining milk, a little at a time.As the dough gets heavy, set the wooden spoon aside and mix with your hands until a soft dough forms. Remember you may use more or less of the milk because different flour brands often hydrate differently. (At least in my country)
- Turn the dough onto a lightly floured surface and knead for about 7 to 10 minutes or until smooth and elastic.Shape the dough into a nice round bowl and transfer it back into the bowl. Brush it with a little cooking oil on the surface to keep it soft and supple during the bulk ferment. Cover the bowl with a clean kitchen towel to allow the dough to ferment for at least 8 hours.Meanwhile, grease and dust your pan.
- After the bulk ferment, the dough should have doubled or tripled in size.
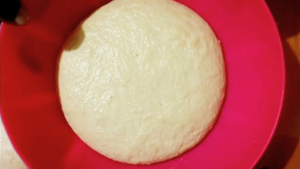
- Uncover the bowl, beat down the dough and knead it for a minute to get it even again.Turn the dough onto your surface and divide it into 8 equal pieces. I like to use a dough scraper for this. You can use a bread knife or your hands too. Shape the dough pieces into balls.
- Arrange the pieces into the greased pan evenly, ensuring they have a little space to expand. Cover them with a clean kitchen towel and let them proof/ rise for another 1 hour.
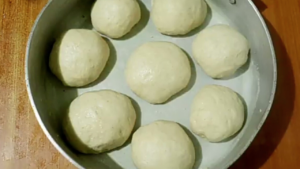
- Transfer the pan with the pieces to your stovetop. Allow the rolls on full flame for about 30 seconds to heat up the pan.If you’re working with the tiny burner on your stove top, reduce the flame to the lowest as designed by your stove/cooker manufacturer. The flame is low enough to bake the rolls without burning.If, however you are working with one of the very wide burners, the lowest flame is too high. It will burn your rolls before they are ready. Instead, reduce the flame as though you are switching off and reduce it to a very tiny flame as shown below, the kind that if you blew hard on it, it would go off.
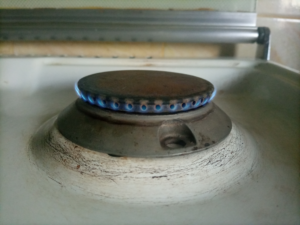
- Bake the rolls for 20 to 30 minutes depending on the intensity of the flame, or until they’ve firmed up on the surface with no raw dough and are a nice golden color underneath.
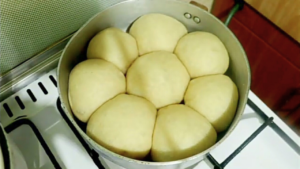
- Usually, they’ll not brown on the surface when baking on the stovetop. We’ll need to invert them back into the pan for them to brown on that side too. We will do this by turning them over on a clean lid. Turn them over again on another clean lid for the part that hasn’t browned to be on the upper side. This is optional but you can brush this part of the rolls with some egg wash to give them the extra shine during this final stage of cooking.
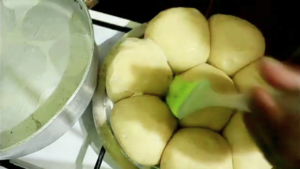
- Carefully slide the pan over the rolls and invert them back in the pan.
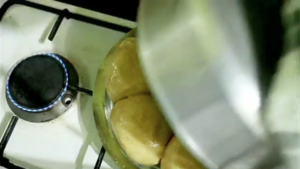
- Bake them another 10 to 12 minutes to brown on that side as well.
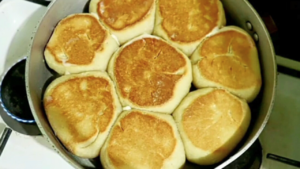
- Flip them over on a suitable plate or platter and let them cool slightly or completely.Serve with a suitable accompaniment and enjoy.Enhance your hospitality for the glory of God.
Video
Notes
Tips for Best No-Oven Sourdough Rolls
Use a Good Sourdough Starter:
A strong, active sourdough starter will give your rolls the best flavor and texture.Don't Over knead:
Over kneading can toughen the dough, so be gentle.Control the Heat:
Monitor the flame to avoid burning the rolls before they are ready.Experiment with Fillings:
Try adding herbs, cheese, or other ingredients to your rolls for a unique twist.Store Properly:
Store leftover rolls in an airtight container at room temperature for up to 2 days or in the freezer for longer. This is one of my go-to recipes for meal prepping. Once I’ve baked the rolls, I let them cool completely. I store in a suitable airtight container or Ziploc bag and store in the freezer for up to a month. They freeze well.Why You Should Make No-Oven Sourdough Rolls
Easy to Make:
This recipe requires minimal effort and no special equipment.Delicious Flavor:
The sourdough starter gives the rolls a unique, tangy flavor.Versatile:
These rolls can be enjoyed with butter, jam, or your favorite savory toppings.Healthy:
Sourdough rolls or bread is easier to digest than traditional rolls/ bread and is packed with nutrients.Fun and Creative:
Experiment with different fillings and toppings to create your own unique rolls. So, what are you waiting for? Give this no-oven sourdough roll recipe a try and enjoy the delicious results!Leave me a comment and let me know how it goes with you when you try this recipe.
Recommended:
Easy Sourdough Starter Recipe for a Beginner
Pan baked Stovetop Enriched Sourdough Sandwich Bread
How to Ferment Porridge Fast With a Sourdough Starter
Sourdough Drop Scones With Dicard| Breakfast Recipe
Sourdough Mahamri Recipe| Swahili Doughnuts
Fermented Porridge Recipe the Natural Way
No Oven 2-ingredients Roasted Groundnuts Recipe
Best Sourdough Drop Scones: An Easy Breakfast Recipe

