Sourdough Donuts
This Sourdough Doughnut recipe has been one of the star recipes in our home since we began making it.
Sourdough doughnuts are Delightful donuts that are far healthier than your usual store-bought doughnuts made with store-bought yeast.
The Fermentation Process
The sourdough in the donuts contains natural wild yeasts that break down the nutrients in your recipe because of the long fermentation process, making it easier for your body to digest them.
The long fermentation process also gives the natural yeast in the sourdough starter time to break down the nutrients in the dough. It also gives them a really good texture and unique delightful flavor.
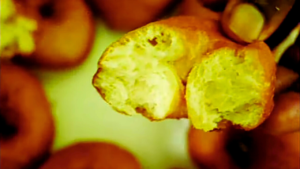
I love the way the doughnuts swell and expand, making them quite tasty, soft on the inside, crunchy on the outside, and quite airy
Sourdough Starter
Sourdough starter is the raising agent in sourdough donuts. You don’t needd another raising agent. Your sourdough starter will give them a really good rise that produces bigger more airy donut pieces.
If you are new to making your own Sourdough Starter, I’ll soon be sharing my process, and how I have been working with Sourdough even without a fridge this season.
No Refrigeration?
At the moment, I am working without a fridge. I’m still able to let my doughnuts proof for 12 hours, sometimes longer, on my kitchen counter. The result is still tasty doughnuts that we enjoy a great deal in my household.
Because I love fresh doughnuts for breakfast, I’ll often work on them the previous evening. I give them an all-night proof then I get to fry them in the morning.
Doughnut Topping
Feel free to dunk your doughnuts in cinnamon sugar or icing sugar.
You can also top them with your preferred frosting, or syrup.
My household loves our donuts just as they are. Fresh and with no sugar coating. I often do not coat them in any.
Working with Sourdough Starter Without a Fridge
Finally, if you are new at working with sourdough and you do lots of baking, you can work with your sourdough starter without refrigeration.
Without a fridge this season as I mentioned earlier, I only ensure to feed it every 12 hours; sometimes after a day.
When I find I am unable to keep it longer, I simply use it, then start a new one when I need it.
I keep working this way until such a time as I will get a fridge then I can keep it for a longer period.
One more thing:
Ensure to feed your sourdough starter at least 8 hours before using it in a recipe unless you want to use it as sourdough discard. This will enhance your recipe’s taste and texture a lot.
Enjoy your sourdough baking and cooking!

How to Make Sourdough Doughnuts| Easy Donut Recipe
Equipment
- 1 Deep frying pan
- 1 Rolling Pin
- 1 doughnut cutter
- 2 mixing bowls
- 1 deep frying spoon
Ingredients
- 4 Cups All-purpose Flour
- ½ Cup Sugar
- 1 Teaspoon Salt
- ¾ Cup Sourdough Starter
- 2 Eggs
- 1 Cup Lukewarm or room Temperature Milk (Plus a little extra just in case dough is not soft enough)
- 1 Tablespoon Marge or Butter (Heaped)
- Cooking Oil to Deep-fry (Should be enough to get to slightly below half in your frying pan)
Instructions
- In a suitable mixing bowl, begin by combining all the dry ingredients with your wooden spoon (or your hands) until evenly mixed. These are the flour, the sugar, and the salt.
- Add the marge or butter and rub it in with your fingertips until ii's well incorporated in the dry ingredients. Set aside.
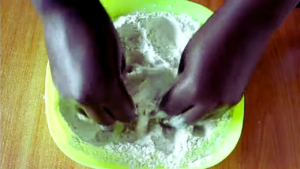
- In a separate mixing bowl, add the eggs and whisk them.
- Add your 1 cup of milk and the sourdough starter to the eggs. Mix these ingredients well.
- Next, begin to add the dry ingredients to the the wet ingredients, beginning with half of the dry ingredients. Mix with your wooden spoon.
- Add the remaining dry ingredients. As the ingredients begin to get too heavy to mix with your wooden spoon, set your wooden spoon aside and begin to Knead the mixture with your hands. Knead until all the ingredients are evenly incorporated.
- Because different brands of flour will hydrate at varying levels, (also depending on the humidity levels in your kitchen) in case your dough is a little too stiff, add a few more drops of milk. Knead until you get the dough to a soft sticky consistency.
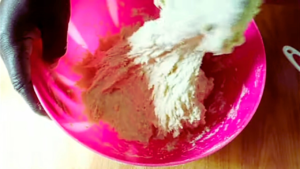
- Transfer the dough onto a floured surface and knead some more. I kneaded my dough for about 5 minutes.
- Transfer the dough back into the mixing bowl, brush the surface of the dough with a little cooking oil to keep it supple through the long fermentation process.
- Cover it with a clean kitchen towel and allow it to ferment in your kitchen undisturbed for 12 hours. You could do as little as two hours ferment. Long fermentation, however, gives the natural yeast time to work on your dough, making it easier for digestion.

- That's how the dough looked after fermenting on my counter for 12 hours.In case you transfer it to the fridge for further fermentation, after the fermentation period, allow it to rest at room temperature for at least an hour before working on it.
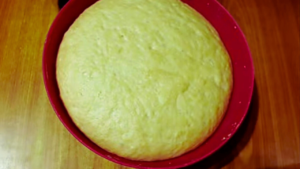
- After fermentation, transfer it once again to a floured surface and knead it for a few minutes.
- With your rolling pin, roll it out to a thickness of about a centimeter. Using your doughnut cutter, cut it into those delightful donut shapes.In the absence of a donut cutter, simply improvise with a wide-mouthed round cup or glass to make the bigger round shapes. You can then use a water bottle top or appropriate cookie cutter to cut out the characteristic small donut pieces from the middle to form the donut holes.
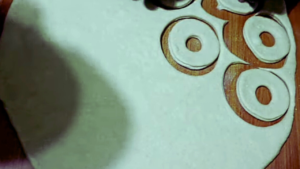
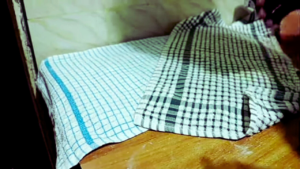
- Arrange the doughnut pieces on your working surface. Cover with kitchen towels and allow them to rest for 30 minutes to an hour.
- Heat up your oil in your deep-frying pan, keeping a steady flame going for even frying. As it gets hot, I like to test it with one of the doughnut pieces. Once it has fried to a golden color on both sides, I then know we're ready to fry the rest.
- Begin adding in your donut pieces, ensuring you do not crowd them in, or else, they'll fry slowly, absorbing the oil.
- Fry to a golden color on that underside. turn them and fry to a golden color on the opposite side. Once the pieces are ready, transfer to a paper towel-lined suitable tray or platter to drain out any excess oil.

- Repeat the above process until all the doughnuts are fried. Serve with suitable beverage and accompaniment.
Video
Recommended:
Easy Sourdough Starter Recipe With Wheat Flour for a Beginner
Sourdough Mahamri Recipe| Swahili Donuts
Sourdough Cookie Recipe| Budget-friendly
Fastest Way to Ferment Porridge With a Sourdough Starter| Porridge Recipe
Sourdough Drop Scones With Discard| Breakfast Recipe

